


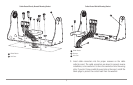
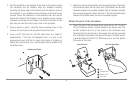

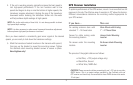
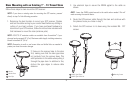

3. Place the escutcheon plate over the cable hole
and use it as a guide to mark the two escutcheon
plate mounting holes. Remove the plate, drill two
9/64" (3.6 mm) holes, then fill both holes with
marine-grade silicone sealant. Place the
escutcheon plate over the cable hole and attach
with two #8 x 5/8" (16 mm) wood screws.
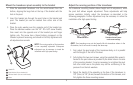
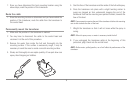
4. Route and secure the cable by attaching the
cable clamp to the transom; drill one 9/64" dia.
(3.5 mm) x 5/8" deep (16 mm) hole, then fill hole
with marine-grade silicone sealant, then attach
the cable clamp using a #8 x 5/8" (16 mm) screw.
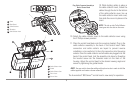
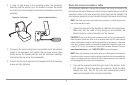
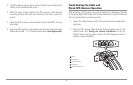
5. Plug the other end of the transducer cable
back into the control head connection holder.
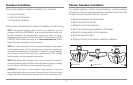
Perform a final test of the transom transducer installation
After transom transducer installation, please perform the final testing and then
finalize the installation (see Test and Finish the Transducer Installation).
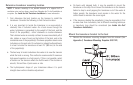
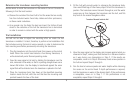
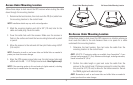
Inside the Hull Transducer Installation
If you choose to mount your transducer inside the hull of your boat, perform the
procedures in this section. In-hull mounting generally produces good results in
single thickness fiberglass-hulled boats. Humminbird® cannot guarantee depth
performance when transmitting and receiving through the hull of the boat,
since some signal loss occurs. The amount of loss depends on hull construction
and thickness, as well as the installation position and process.
This installation requires slow-cure two-part epoxy. Do not use silicone or
any other soft adhesive to install the transducer, as this material reduces the
sensitivity of the unit. Do not use five-minute epoxy, as it has a tendency to
cure before all the air bubbles can be purged, thus reducing signal strength.
NOTE: In-hull mounting requires an installed and operational control head.
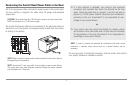
Rivets/Strakes
1
Step
2
1
Preferred Mounting Area
2
5/8” (18 mm) hole
1
Escutcheon Plate
2
Cable Clamp
3
Routing the Cable
1
2
3
17