


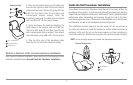

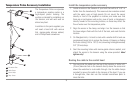

4. If the unit is working properly, gradually increase the boat speed to
test high-speed performance. If the unit functions well at low
speeds but begins to skip or miss the bottom at higher speeds, the
transducer requires adjustment. Angling the rear of the transducer
downward and/or lowering the transducer farther into the water
will help achieve depth readings at high speeds.
NOTE: Due to the wide variety of boat hulls, it is not always possible to obtain
high speed depth readings.
NOTE: It is often necessary to make several incremental transducer adjustments
before optimum high speed performance is achieved.
Once you have reached a consistently good sonar signal at the desired
speeds, you are ready to lock down the transducer settings.
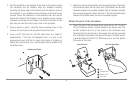
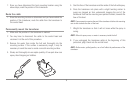
5. Mark the transducer bracket location on the transom with a pencil,
then pop up the bracket to reveal the mounting screws. Tighten
the stainless steel mounting bracket screws to secure in place.
Hand-tighten only!
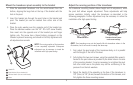
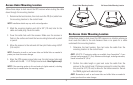
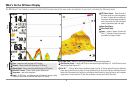
GPS Receiver Installation
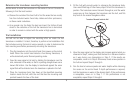
To optimize performance of the GPS receiver, mount it in an area that has full
exposure to the sky. The effective area of reception is 10° above the horizon.
Different circumstances determine the mounting method appropriate for
your GPS receiver.
If you have… Then use:
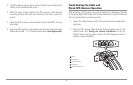
The pinouts of the pigtail cable are as follows:
• Red Wire, +12V (output voltage only)
• Black Wire, Ground
• White Wire, NMEA Out.
CAUTION! Please use caution before connecting the red +12V wire to any other
NMEA device. This is an output voltage provided by the Fishfinder unit and
GPS receiver and should only be connected to those NMEA devices that need a
12 volt input.
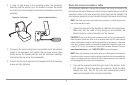
An existing antenna stem with
standard 1" – 14 thread stem
Access for cable routing under
the mounting location
No access under the mounting
location
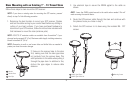
Stem Mount with Existing
1” - 14 Thread Stem
Access Under Mounting
Location
No Access Under Mounting
Location
21