


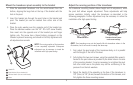


7. Once you have determined the best mounting location using the
above steps, mark the position of the transducer.
Route the cable
1. Once the mounting location is determined and you have marked the
position of the transducer, route the cable from the transducer to
the control head.
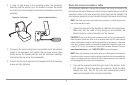
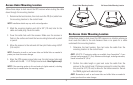
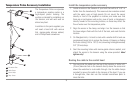
Permanently mount the transducer
1. Make sure the position of the transducer is marked.
2. You may have to disconnect the cable to the control head and
reconnect it at the end of this procedure.
3. Remove the water from inside the hull and thoroughly dry the
mounting surface. If the surface is excessively rough, it may be
necessary to sand the area to create a smooth mounting surface.
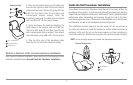
4. Slowly and thoroughly mix an ample quantity of two-part slow cure
epoxy. Avoid trapping air bubbles.
5. Coat the face of the transducer and the inside of the hull with epoxy.
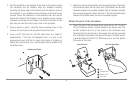
6. Press the transducer into place with a slight twisting motion to
purge any trapped air from underneath, keeping the end of the
transducer that has the mounting ears pointed forward, towards the
bow of the boat.
NOTE: Proper operation requires the end of the transducer that has the mounting
ears to face towards the bow of the boat.
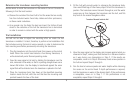
7. Weight the transducer so that it will not move while the epoxy is
curing.
NOTE: When the epoxy cures, no water is necessary inside the hull.
8. If you unplugged the transducer cable at the beginning of this
procedure, plug it back into the control head.
NOTE: Neither water, spilled gasoline, nor oil will affect the performance of the
transducer.
19