31
&20081,&$7,1*$,'6
Q 'DWD92;'HOD\7LPH
Select an appropriate delay time for after the audio
signal input to the ACC2 or USB connector ends.
1 Press [MENU], then press [Q-M.IN]/ [Q-MR] or
turn the MULTI/CH control to select Menu No. 70.
2 Press [M.IN]/ [SCAN (SG.SEL)] to set your
desired delay time.
3 Press [MENU] to exit Menu mode.
Q
86%$&&92;*DLQ
When using the ACC2 or USB connector for VOX
transmission, take the time to properly adjust the
VOX gain.
1 Press [MENU], then press [Q-M.IN]/ [Q-MR]
or turn the MULTI/CH control to select Menu
No. 71 (USB connector) or Menu No. 72 (ACC2
connector).
2 While sending an audio signal to the ACC2 or
USB connector, adjust the value (default is 4)
using [M.IN]/ [SCAN (SG.SEL)] until the
transceiver reliably switches to transmit mode
each time you send an audio signal to the
connector.
3 Press [MENU] to exit Menu mode.
63((&+352&(6625
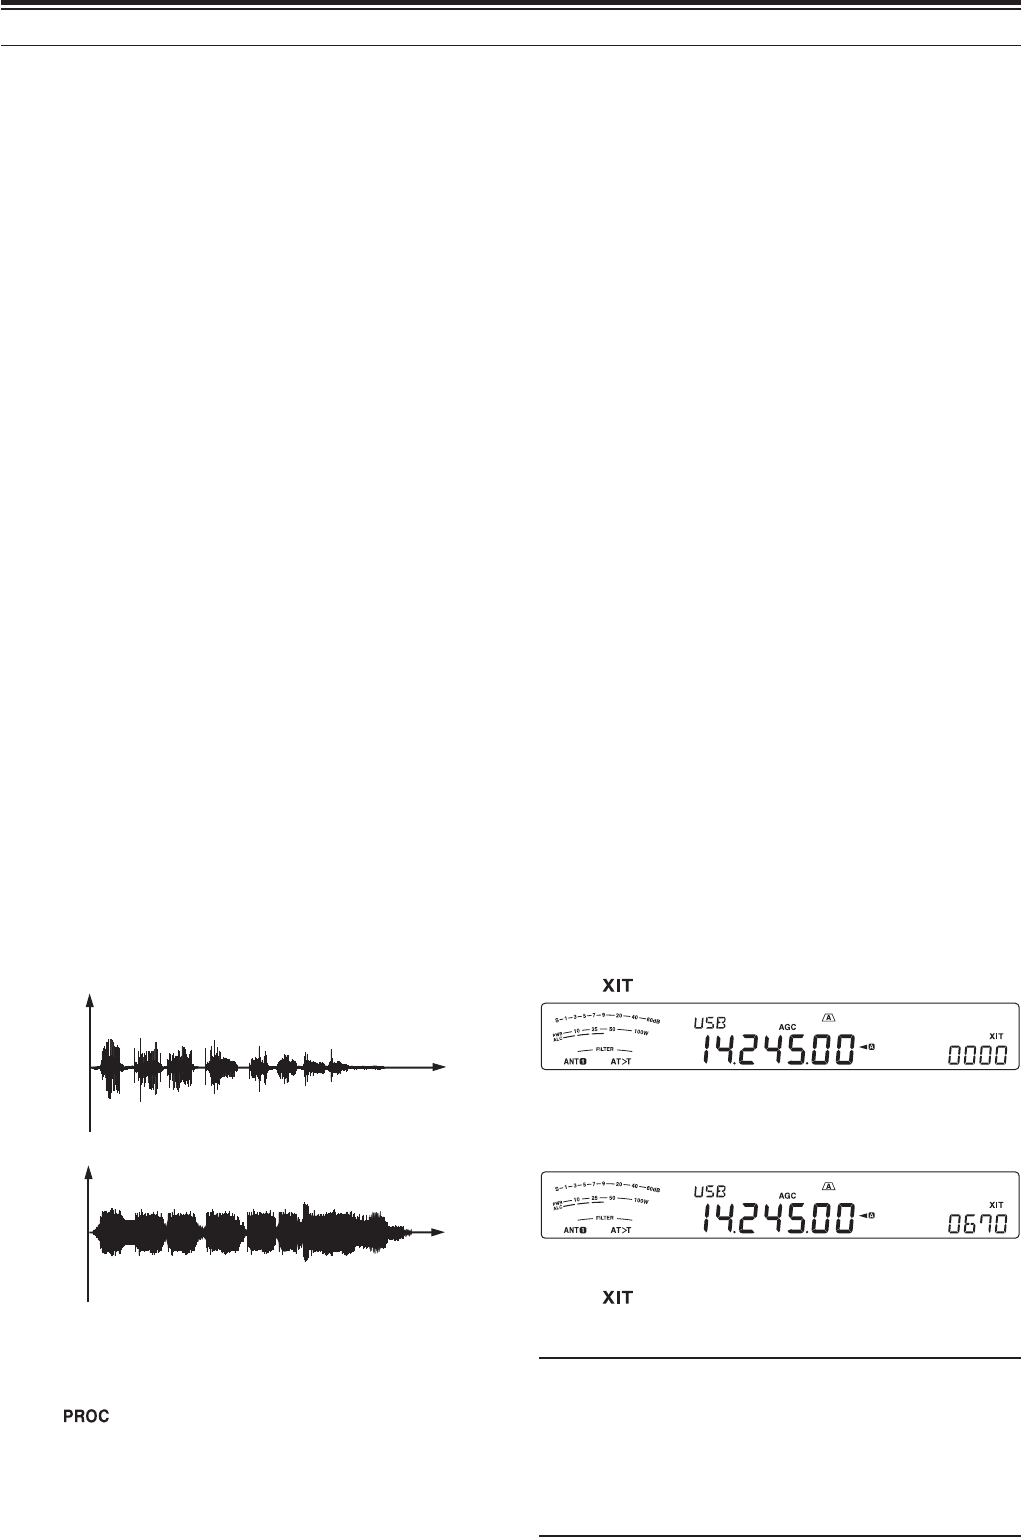
The Speech Processor levels out large fluctuations in
your voice while you speak. When using SSB, AM, or
FM mode, this leveling action effectively raises
the average TX power (SSB/AM) or raises the
deviation to an adequate level (FM), resulting in a
more understandable signal. The amount of voice
compression is fully adjustable. Using the Speech
Processor makes it easier to be heard by distant
stations.
Level
Level
Time
Time
Speech
Processor
ON
Speech
Processor
OFF
1 Select USB, LSB, AM, or FM mode.
2 Press [PROC (LEV)] to turn the Speech Processor
ON.
•“
” appears.
3 Press and hold [PROC (LEV)] to enter the Speech
Processor input level adjustment mode.
4 As you speak into the microphone, turn the
MULTI/CH control so that the compression meter
indicates that the compression level is around
10 dB while you speak.
• Using higher compression will not improve
your signal clarity or apparent signal strength.
Excessively compressed signals are more
difficult to understand due to distortion and are
less pleasant to hear than signals with less
compression.
5 Press and hold [PROC (LEV)] to exit the Speech
Processor input level adjustment mode.
6 Press [MIC (CAR)] to enter the Speech Processor
output level adjustment mode.
• As you speak into the microphone, turn the
MULTI/CH control so that the ALC meter
reflects according to your voice level, but does
not exceed the ALC limit. Press [MIC (CAR)] to
exit when you finish the adjustment.
Q
6SHHFK3URFHVVRU(IIHFW
When using the Speech Processor, you can
change its effect.
1 Press [MENU], then press [Q-M.IN]/ [Q-MR] or
turn the MULTI/CH control to select Menu No.
29.
2 Press [M.IN]/ [SCAN (SG.SEL)] to set the
Processor Effect to SOFT or HARD (default).
3 Press [MENU] to exit Menu mode.
;,775$160,7,1&5(0(17$/781,1*
Similar to RIT, XIT provides the ability to change your
transmission frequency by ±9.99 kHz in steps of
10 Hz without changing your reception frequency. If
the Fine Tuning function is ON, the frequency step
size becomes 1 Hz (±9.999 kHz).
1 Press [XIT].
•“
” and the XIT offset appear.
2 If required, press [CL] to reset the XIT offset to 0.
3 Turn the RIT/ XIT control to change your transmit
frequency.
4 To turn XIT OFF, press [XIT].
•“
” and the offset frequency disappear. The
transmission frequency is returned to the
frequency that was selected prior to step 1.
Note:
X If the Fine Tuning function is ON, you can adjust the
frequency within ±9.99 kHz.
X The frequency shift set by the XIT control is also used by the
RIT function. Therefore, changing or clearing the XIT offset
also affects the RIT offset.
X When the XIT frequency goes beyond the available
transmission frequency, the transceiver automatically stops
transmitting.


