


58
23(5$725&219(1,(1&(6
software misdetects a busy signal, set Menu No.
76 to “OPEN”.
• When not using the USB terminal, besides a serial
cable, create and connect a sound input/output
cable. In this case when connecting to sound
equipment and the audio output level is too high,
change the level setting in Menu No. 66.
• After changing this setting via the menu, turn the
power OFF and then back ON to implement the
change.
&21752//,1*7+(766)520$3&
If a PC and the TS-590S are connected using a
serial cable {page 67}, you can remotely control the
functions of the TS-590S from a PC. Download the
free ARCP-590 software from the following URL:
http://www.kenwood.com/i/products/info/amateur/software
_download.htm
l
The detailed remote controlling instructions are
available in accompanied documents and help file.
5(027(/<&21752//,1*7+(766217+(
1(7:25.
In addition to the ARCP-590 program, the ARHP-590
program can also be downloaded from the above
site. This ARHP-590 program is an ARCP-590 host
program that allows a user who is connected in the
network to remotely control the TS-590S transceiver
from a distant location. If you make interface
cables that transfer the audio between the TS-590S
transceiver and the PC on the host transceiver, you
can receive signals and transmit your voice over the
network. For detailed information, download the
ARHP-590 program and consult the accompanied
documents.
Note: The ARHP-590 does not support voice communication.
In order to use voice communications, you must also use
universal VoIP software.
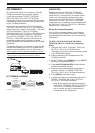
237,21$/9*692,&(*8,'(
6725$*(81,7
The optional VGS-1 unit allows you to record 30
second (maximum) voice messages to memory
channels 1 and 2, and 15 second (maximum) voice
messages to memory channels 3 and 4. After
recording a message via your transceiver microphone,
you can then transmit those recorded messages. It
also announces the key function and frequencies each
time you press a key (Voice announcement). Since
the incoming reception signal is processed in digital
data in the transceiver, the VGS-1 can be configured
to constantly store the incoming audio signals in the
background. If you wish, you can store the last 30
seconds of the incoming signal to the VGS-1 for the
later playback (Constant recording).
For information on how to install the VGS-1 unit, refer
to “INSTALLING OPTIONS” {page 71}.
(;7(51$/$8',26(77,1*6
Q 6HOHFWLQJD'DWD7UDQVPLVVLRQ/LQH
Depending on how you connect your transceiver
to a PC, you will need to set a data transmission
line type. Access Menu No. 63 and select “ACC2”
(default) or “USB”.
Q $XGLR/HYHO6HWWLQJV
You can set the input and output audio levels of
an ACC2 connection via Menu Nos. 66 and 67,
and the input and output audio levels of a USB
connection via Menu Nos. 64 and 65. Each setting
has a range of 0 to 9, with a default setting of 4.
Additionally, you can mix beep tones, the sidetone,
and the Voice guide for an ACC2/USB audio
output by accessing Menu No. 68 and selecting
“on” (whereby the PC will confirm the sounds being
output from the transceiver speaker).
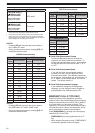
&+$1*,1*7+(6,*1$/)257+(&207(50,1$/
Send the PSQ (SQL control signal) and PKS signal
through the COM terminal.
1 Turn the transceiver power OFF.
2 Press [FM/AM (FM-N)] + [ ].
• “PSQ/PKS” momentarily appears, and the
RTS/CTS signal is replaced with the PSQ/PKS
signal at the COM terminal.
3 Repeat steps 1 and 2 to return to normal operation.
• “CTS/RTS” momentarily appears.
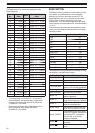
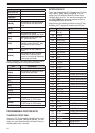
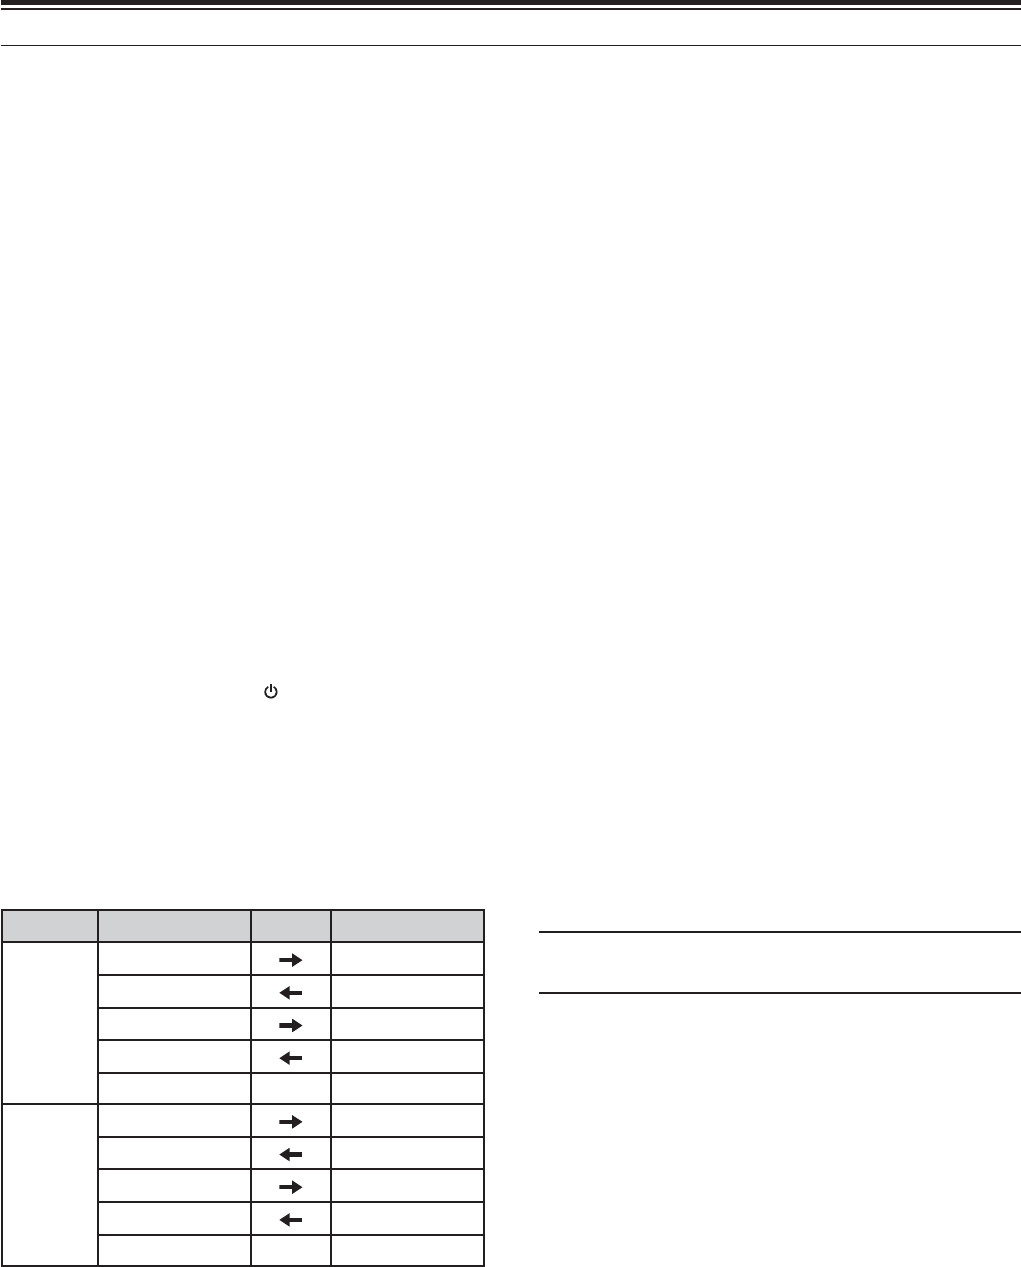
The operation of the output signal for each setting is
as follows:
COM Terminal
PC
CTS/
RTS
TxD RxD
RxD TxD
RTS CTS
CTS RTS
GND GND
PSQ/
PKS
TxD (stopped) RxD
RxD (stopped) TxD
PSQ CTS
PKS RTS
GND GND
Normal PC commands (ARCP, ARHP, or SKY
COMMAND) will not work when this function is turned
ON.
• When operating the TS-590S as a base station,
using VoIP or similar software, set Menu No. 77 to
“SQL”.
At the same time, if you are using CTCSS, set
Menu No 75 to “2” and confirm that the frequency
is not already in use and is not causing any
interference.
• When turning the power OFF and the VoIP