


900-0112-01-00 Rev B 9
Commissioning
Functional Test
Pre-startup Procedures
1. Ensure all DC and AC overcurrent devices are opened or turned off.
2. Double-check all wiring connections.
3. Inspect the work area to ensure tools or debris have not been left inside.
4. Verify battery voltage using a digital voltmeter (DVM). Confirm the voltage is correct for the
inverter model. Confirm the polarity.
5. Connect the system display (if present).
Startup
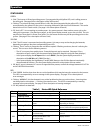
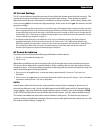
Figure 3 AC Wiring Compartment
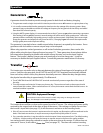
CAUTION: Equipment Damage
Incorrect battery polarity will damage the inverter. Excessive battery voltage also may damage
the inverter. This damage is not covered by the warranty.
Continued on the next page...
If steps are inapplicable, they can be omitted. However, it is highly
recommended that all applicable steps be performed as below.
If the results of a step do not match the description, see the
Troubleshooting section on page 31.
To start the system:
1. Close the main DC circuit breaker (or connect the fuse) from the
battery bank to the inverter. Repeat for every inverter present.
2. Observe the LEDs in the AC wiring compartment. One of the
three BATTERY LEDs should be illuminated — green, yellow, or
red. Any of them are acceptable at this stage. (See page 11 for
a description of the LEDs.) The INVERTER LED (green) may
come on at this time. The fan will run briefly and the relay will
click as a self-test.
3. The ERROR LED may flash briefly. If it remains illuminated or
continues to flash during any step, proceed immediately to
page 31 for troubleshooting.
4. Confirm that the system display is operational. (See the system
display manual for a description of the menu items that appear
on a correctly functioning display.)