


Page 46 GPS chartplotters
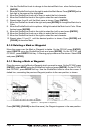
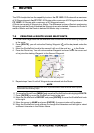
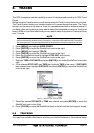
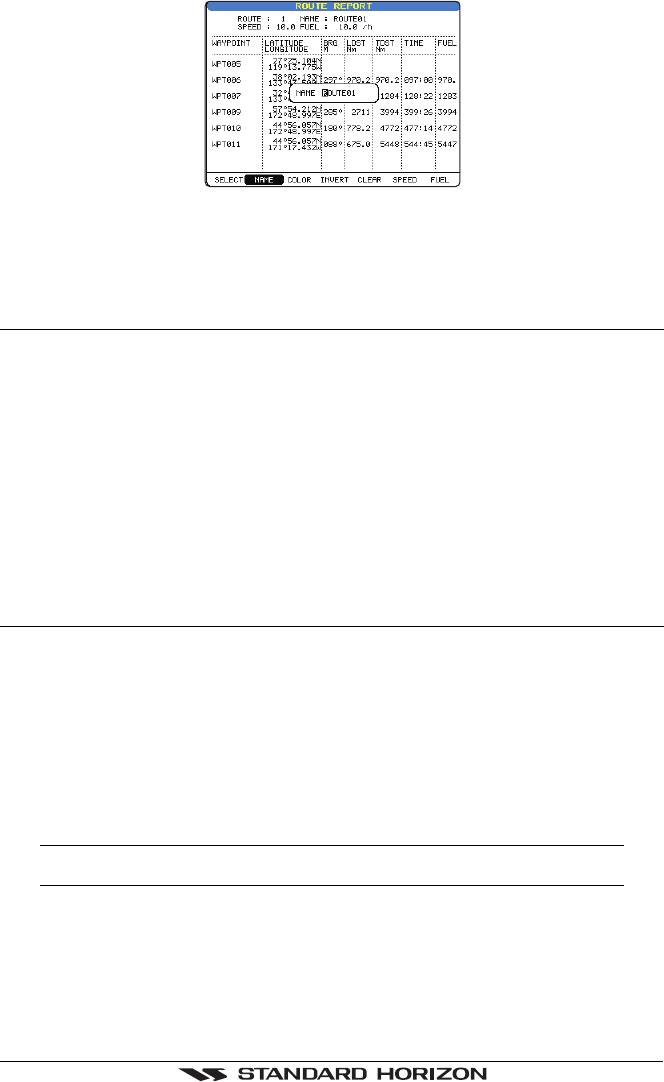
Figure 7.0 - Route Report
11. When finished press [ENTER] to save.
12. Press [CLEAR] or move the ShuttlePoint knob to the left until the Chart Page is shown.
7.1 MAKING ADDITIONAL ROUTES
To create another Route the chartplotter must be told that you want to create a second Route.
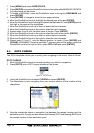
1. Press [MENU] and move the ShuttlePoint knob to select
USER POINTS and press
[ENTER].
2. Move the ShuttlePoint knob to select
ROUTE and press [ENTER].
3. Move the ShuttlePoint knob until
SELECT is highlighted.
4. Press [ENTER] or move the ShuttlePoint knob to the right.
5. Move the ShuttlePoint knob to an open Route number example Route 2.
6. Press [ENTER] or move the ShuttlePoint knob to the right.
7. Press [CLEAR] or move the ShuttlePoint knob to the left until the Chart page is shown.
8. To create the new Route, follow the steps in Creating a Route using Waypoints or Mark
sections.
7.2 CREATING A ROUTE USING MARKS ON THE CHART PAGE
To create a Route containing Marks you first must create the Marks and show them on the
Chart page.
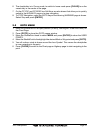
1. Move the ShuttlePoint knob over the top of a Mark that you wish to be the starting point
in the Route and press [ROUTE].
2. Next move the ShuttlePoint knob until the cursor is over the Mark that you want to be
the next leg in the Route
3. Press [ROUTE]. You will notice a bearing line joins the first and second Mark which
means these Marks are selected into the Route.
4. Repeat steps 3 and 4 until all Marks are entered into the Route.
NOTE
At this point the Route is saved as ROUTE01. If you would like to save the Route under a specific
name follow the remaining steps.
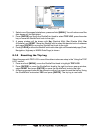
5. To name the Route Press [MENU] and move the ShuttlePoint knob to highlight USER
POINTS. Press [ENTER] or move the ShuttlePoint knob to the right.
6. Move the ShuttlePoint knob to select ROUTE and press [ENTER].
7. Move the ShuttlePoint to
REPORT and press [ENTER] or move the ShuttlePoint knob
to the right.
8. Move the cursor to
NAME and press [ENTER]. A popup window will be shown.