


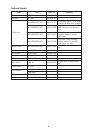

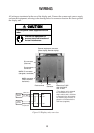
2
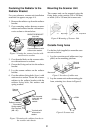
Fastening the Radiator to the
Radiator Bracket
For your reference, scanner unit installation
materials list appears on page A-8.
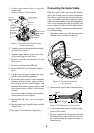
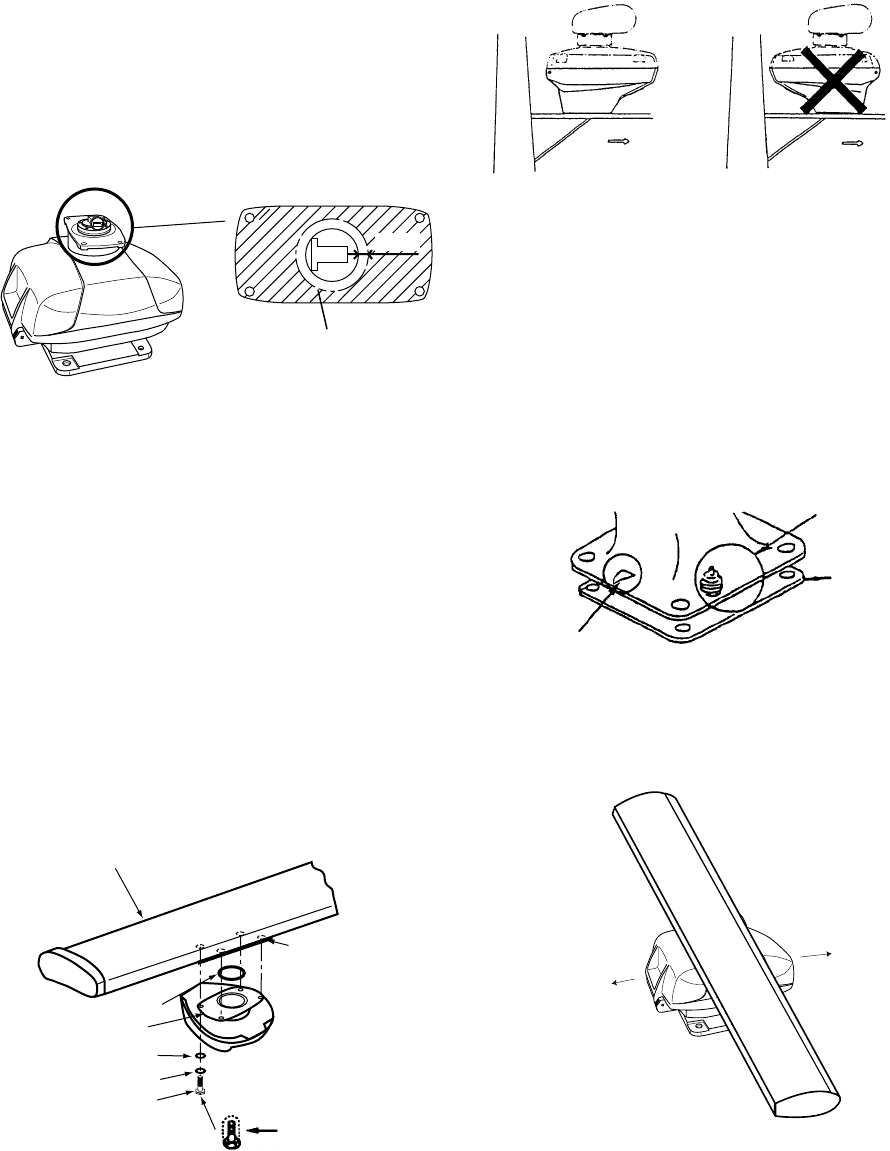
1. Remove the radiator cap from the radiator
bracket.
2. Coat contacting surface between scanner
radiator and radiator bracket with anticor-
rosive sealant as shown below.
RADIATOR BRACKET
(top view)
Coat hatched area with
anticorrosive sealant.
10mm
Figure 2 Coating the scanner bracket with
anticorrosive sealant
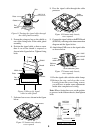
3. Coat threaded holes on the scanner radia-
tor with anticorrosive sealant.
4. Grease the O-ring and set it to the radiator
bracket.
5. Lay the scanner radiator on the radiator
bracket.
6. Coat the radiator fixing bolts (4 pcs.) with
anticorrosive sealant. Fasten the scanner
radiator to the radiator bracket with the
radiator fixing bolts, flat washers and
spring washers.
Flat washer
Spring washer
Hex head bolt
(M8 x 30)
Radiator bracket
Coat bolts with
anticorrosive
sealant.
Scanner
radiator
O-ring
Coat threaded
holes with anti-
corrosive
sealant.
Figure 3 Fastening the radiator bracket to
the scanner unit chassis
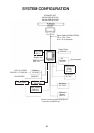
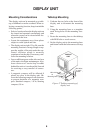
Mounting the Scanner Unit
The scanner unit can be mounted using the
fixing holes on the outside (200 x 200 mm)
or inside (140 x 150 mm) the scanner unit.
Ship's Bow
Ship's Bow
Figure 4 Mounting of Scanner Unit
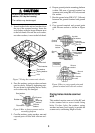
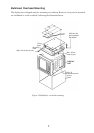
Outside fixing holes
Use the hex. bolt (supplied) to mount the scan-
ner unit as below.
1. Lay the corrosion-proof rubber mat (sup-
plied) on the mounting platform.
Ground
terminal
Rubber
mat
Bow mark
Figure 5 Location of rubber mat
2. Lay the scanner unit on the mounting plat-
form, orienting it as shown in Figure 6.
STERN
BOW
Figure 6 Scanner unit