


Basic installation tasks that you must perform include:
• Installing the control head (choosing either gimbal or in-dash mounting)
• Installing the transducer (choosing either the transom mount, inside the hull
mount, or trolling motor mounting method)
• Installing the GPS Receiver
• Installing the Temperature Probe Accessory
• Testing the complete installation and locking the transducer position.
The supplied Humminbird® transducer uses a two piece kick-up mounting bracket. In
addition, you will need to install the included GPS antenna and the included
Temperature Probe accessory.
NOTE: Accessories may require a separate purchase. You can visit our website at
www.humminbird.com to order these accessories online or contact our Customer Resource
Center at 1-800-633-1468.
CONTROL HEAD INSTALLATION
You have two choices for mounting your 900 Series™ control head:
• Gimbal mounting, where you use a surface on the boat, such as the dash, to
mount the control head so that it can be tilted up or down, or
• In-dash mounting, where you cut a hole in the dash in order to allow the control
head to be recessed into the dash, and the control head cannot be moved after
mounting.
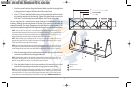
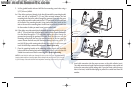
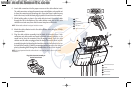
GIMBAL MOUNTING THE CONTROL HEAD
If you are gimbal mounting the Humminbird® 900 Series™, you can pre-assemble the
unit in order to plan the best mounting location.
Parts and tools specific to gimbal mounting are:
• Gimbal mounting bracket and screws
• Gimbal mounting knobs and washers
• Phillips head screwdriver
• 5/16" socket wrench or flat head screw driver
• Hand drill with various drill bits
• Marine-grade silicone sealant.
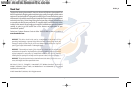
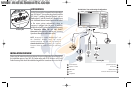
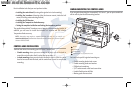
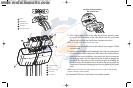
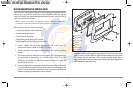
Washer
1
Gimbal Knob
2
Gimbal Bracket
3
Expansion ports - use for future accessories
4
3
2
1
4
4
531374-1_A - 947 Man.qxd 2/15/2005 7:52 PM Page 9