


16
few seconds and the menu will automatically disappear from the screen
or press the CLR key to erase it.
Manual mode
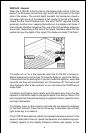
When the X-70A 3D is in the manual mode, any range can be selected.
The unit will leave the range setting you choose, but it won't keep the
bottom on the display. For ex-
ample, if the range is 0 - 60
feet, and the bottom signal
goes from 55 to 70 feet, once
the bottom goes deeper than
60 feet, it won't show on the
display.
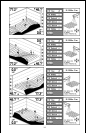
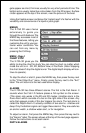
To change the range, first
press the RANGE key. A
screen similar to the one at
right appears. You can simply
use the up or down arrow keys
to select the range, or you can
use the upper and lower limit menus.
The X-70A 3D uses the following ranges: 0 - 5, 10, 20, 40, 60, 80, 100,
150, 200, 300, 400, 500, 700, and 900 feet.
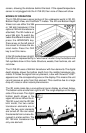
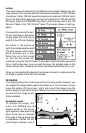
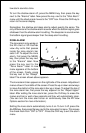
Upper and Lower Limits
The X-70A 3D gives you added versatility with the upper and lower limits
menu. The upper limit is the depth shown at the top of the screen, which is
normally zero. The lower limit is the depth shown at the bottom of the
screen which is normally a range such as 60 feet. By manually entering
the upper and lower limits, you can select any segment of the water using
increments as little as one foot! Changing the upper and lower limits in
this manner actually gives you a zoom in the manual mode that is much
more versatile than the standard zoom.
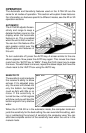
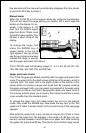
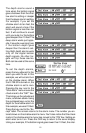
To change the upper limit, first make certain the unit is in the manual
mode, then press the RANGE key. Now press the key next to the "Set
Upper Limit" label. A screen similar to the one at the top of the next page
appears.
Now enter the upper limit, in any number as long as it's 10 feet or more
less than the lower limit. For example, if the range is 0 -60 feet, you can
use any number between 0 and 50 feet as an upper limit. After entering
the upper limit, press the ENT key. This returns the unit to the range menus