


45
OCL OPERATING MANUAL
© 2002 Design, 2014 Doc. No. 12-5378-r01 (4/9/15)
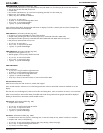
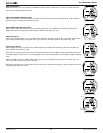
Battery Removal
• There is no need to remove the straps.
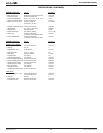
• Remove the (4) retaining screws located on the back of the case (Fig. 133) by turning them counter clockwise with a
small at tip 3mm screw driver.
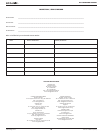
• Carefully separate the front and back sections. If necessary, insert a small at tip screw driver in the slot machined
into the Cover at the 5 or 11 O'clock position (Fig. 134) and gently pry the Battery Cover loose, then lift it off the case.
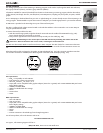
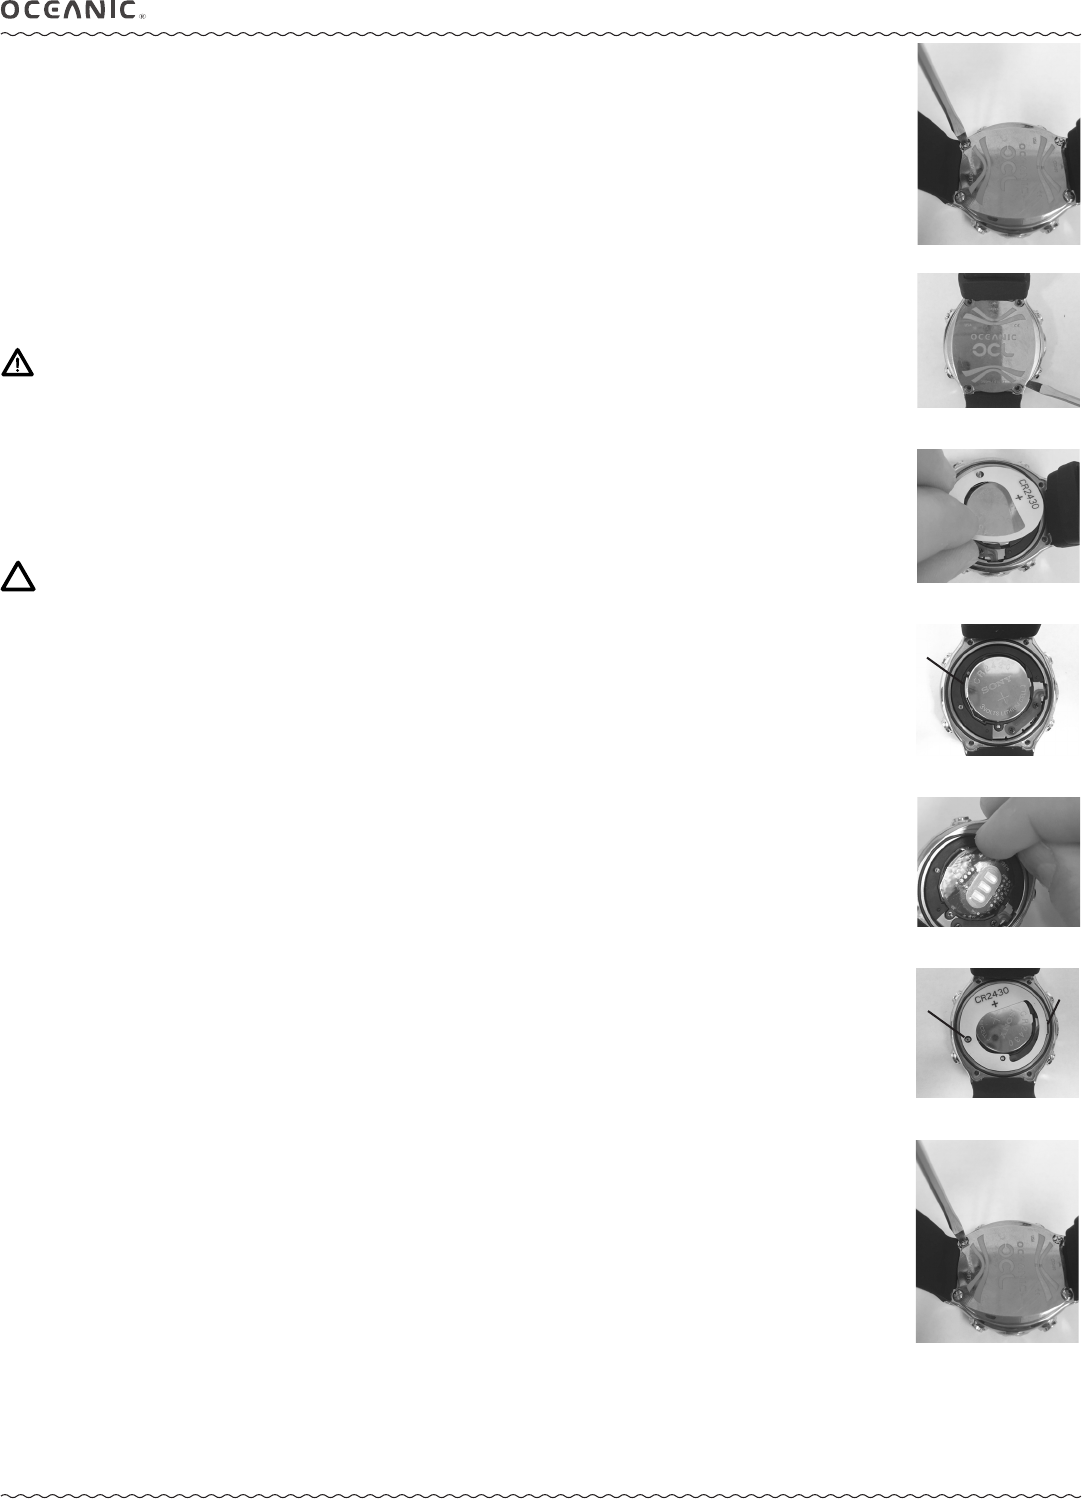
• Carefully, remove the battery insulator shim (Fig. 135).
• Release the securing battery contact (Fig. 136a), and turn the case to one side to drop the Battery into your hand. If
necessary, gently loosen it with the tip of your nger. DO NOT use tools to pry it out, or short the positive (+) top of
the Battery to the negative ( - ) contact under it.
• Discard the Battery according to local regulations governing disposal of Lithium batteries.
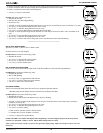
Inspection
• Closely check all of the sealing surfaces for any signs of damage that might impair proper sealing.
• Inspect the buttons, lens, and housing to ensure they are not cracked or damaged.
WARNING: If damage or corrosion is found, return your OCL to an Authorized Oceanic Dealer, and DO
NOT attempt to use it until it has received factory prescribed service.
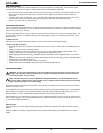
• Remove the cover O-ring with your ngernail or by pinching along one side of its circumference (Fig. 137). Discard,
and do not attempt to reuse it.
> DO NOT use tools to remove the O-ring.
> To ensure proper sealing, O-ring replacement is required each time the Battery is replaced.
Battery Installation
NOTE: The O-ring must be a genuine Oceanic part available at an Authorized Oceanic Dealer. Use of
any other O-ring will void the warranty.
• Very lightly lubricate the new O-ring with silicone grease and seat it into the O-ring groove.
• Place a new 3 volt type CR2430 Lithium Battery, negative side down into the Battery cavity and ensure that it is evenly
positioned.
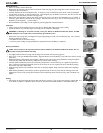
• Replace the battery shim insulator. Ensure that it is tted correctly. The contact spring should be running through the
small hole (Fig. 138a) and the tab (Fig. 138b) lined up with the watch housing.
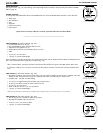
• Carefully position the Battery Cover over the battery compartment. Use the OCL logo as a guide for top/bottom.
Also, a small arrow has been engraved on the top of the Cover to serve as a guide. The arrow should be pointing
towards the strap with a metal clasp.
• While ensuring that the cover and back of the case are properly aligned, rmly press them evenly and completely
together.
• While holding the Battery Cover rmly in position against the back of the case, insert the (4) retaining screws and
tighten them until secure by turning them clockwise with a small at tip 3mm screw driver (Fig. 140). DO NOT over
tighten.
Testing
> Activate the unit and ensure that the LCD is clear and sharp in contrast. If any portions are missing or appear dim, or if
a Low Battery condition is indicated, return the OCL to an Authorized Oceanic Dealer for evaluation before use.
Fig. 136 - RELEASE
BATTERY TERMINAL
Fig. 135 - REMOVE
SHIM
Fig. 133 - CASE BACK
Fig. 138 - REPLACE
SHIM
Fig. 137 - REMOVE
O-RING
Fig. 134 - TO LOOSEN
BATTERY COVER
a
a
b
Fig. 140 - REPLACE
SCREWS