6
VTX OPERATING MANUAL
© 2002 Design, 2014 Doc. No. 12-5382-r01 (10/24/14)
HOME MENU
MY INFO
DC INFO
SETUP
LOG
HISTORY
NORM
GAUG
FREE
COMPASS
INTERACTIVE CONTROL CONSOLE
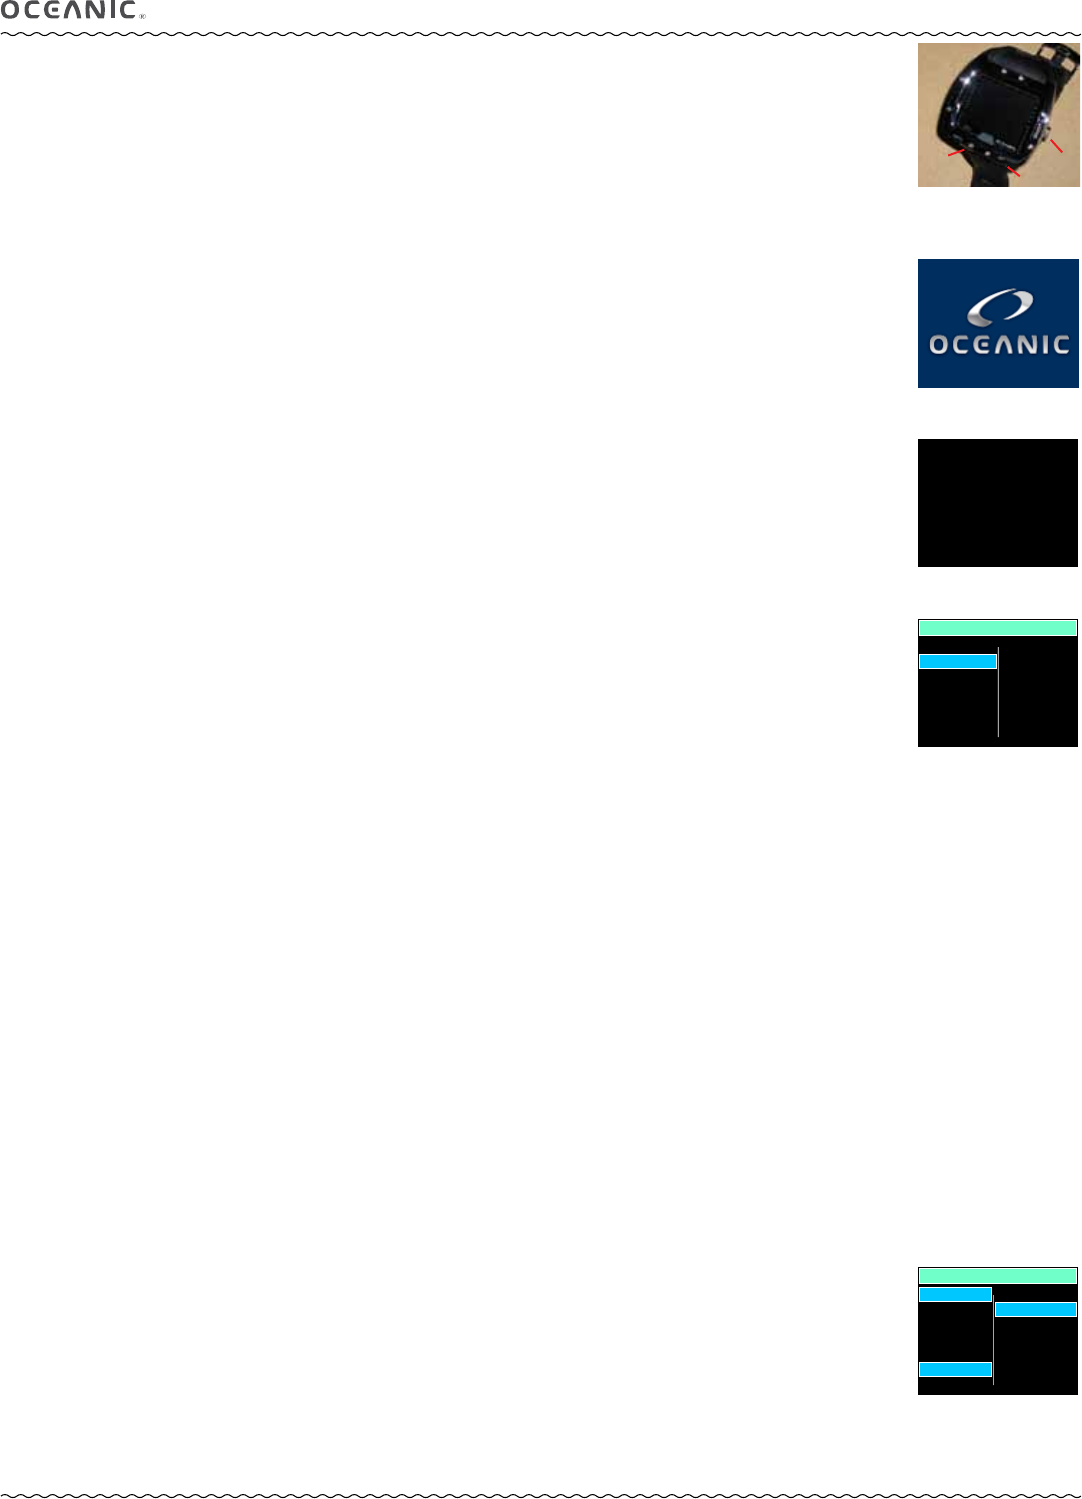
The interactive control console utilizes 3 control buttons that are referred to as M, A, and S (Fig. 1).
• M (left front) - Menu, Mode, Minus (decrease)
• A (right front) - Advance, Add (increase).
• S (right side) - Select, Save.
ACTIVATION
To activate the VTX, press/release any button.
• An Oceanic welcome screen will be displayed for 3 seconds (Fig. 2)* during which diagnostics will be performed verifying
that sensors and battery voltage are within tolerance.
*After the Battery is replaced on a new day prior to performing any dives, a message is displayed before the welcome.
• It will also check ambient barometric pressure, and calibrate present depth as 0. When at 3001 feet (916 meters), or
higher, it will adjust depth for the higher altitude.
• After the diagnostic check, the Home Menu screen will be displayed (Fig. 3) allowing you to select what you would like to
do (view information, perform setup, access operating modes).
• If no button is pressed within 2 minutes, the unit will enter PSM (Power Saver Mode) turning the screen off.
Refer to page 8.
• If no dive is made within 2 hours, the unit will shut Off.
Wet activation contacts will automatically activate the unit and cause it to enter dive mode when the contacts become wet and
it senses depth of 5 FT (1.5 M). They will not inadvertently activate Surface Mode such as when in a wet gear bag.
MENU SYSTEM
The viewing area is used to display alpha numeric messages and measured values as well as menu type systems for selection of
settings and various auxiliary functions. It also serves as the Digital Compass.
Menus which are identified by function such as Main, Set, and Switch. The items available within the menus vary according to
the mode you are in at the time. Some settings, such as for Units, are common throughout the modes and can be changed in any
Utilities Menu.
• Home Menu
>> Home Setup Menu
>> Set Date Time Menu
• NORM Surface Main Menu
>> Set Gas Menu
>> Set TMTs Menu
>> Set Alarms Menu
>> Set Utilities Menu
>> Set Preview Menu
• NORM Dive Menu
>> Gas/TMT Switch Menu
• GAUG Surface Main Menu
>> Set TMTs Menu
>> Set Alarms Menu
>> Set Utilities Menu
• GAUG Dive Menu
>> TMT Switch Menu
• FREE Surface Main Menu
>> Set Menu
• Compass Surface Menu
>> Reference Menu
>> Set Declination Menu
• Compass Dive Menu
>> Reference Menu
Upon entering a menu, movement through it starts at the first (top) selection, then continues in a rolling manner down the screen.
Items or selections are generally shown in columns of up to 7 items. Additional items form a second column (Fig. 4).
Typical button operations within menu systems >>
A (< 2 sec) - to step down the screen (forward) through selections.
M (< 2 sec) - to step up the screen (backward) through selections.
S (< 2 sec) - to select or access the item highlighted.
S (2 sec) - to step back to the menu after the item is selected.
M (2 sec) anytime, or no button action for 2 minutes - will revert to Home or the Surface Main.
Fig. 3 - Home Menu
(after Diagnostics)
Fig. 2 - Diagnostic Check
(for 3 sec, then Home Menu)
GAS 1
GAS 2
GAS 3
GAS 4
DEPTH AL
TLBG AL
TURN AL
END AL
WATER
DEEP STOP
SAFE STOP
EDT AL
DTR AL
NORM SET PREVIEW
Fig. 4 - Sample Menu
(13 items, 2 columns)
Fig. 1 - Control Buttons
WAIT FOR BEEP
THEN ACTIVATE
Fig. 2A - Message given after
Battery Change on new day


