


Chapter 2: Installation 11
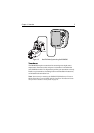
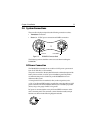
2.5 Mounting the Fishfinder
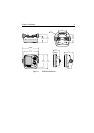
The DS400/500 can be mounted on a dash, chart table, bulkhead, or
deckhead using the supplied hardware. The unit can also be flush mounted
directly into the console.
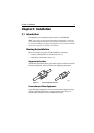
Bracket Mounting
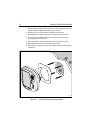
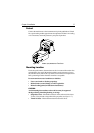
➤ To mount the DS400/500 on the supplied bracket:
1. Loosen the knobs and remove the mounting bracket from the unit.
2. Mark the locations of the mounting bracket screw holes on the mounting
surface.
3. Drill 5/16" (7 mm) holes through the mounting surface at the marked
locations.
4. Align the mounting bracket holes with the holes on the mounting surface.
5. Use the screws and nuts supplied to attach the mounting bracket to the
mounting surface at the marked locations.
6. Attach the unit to the mounting bracket, adjust the display angle, and
tighten the knobs.
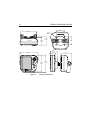
Console Mounting (optional)
The fishfinder may also be installed directly into the console. This requires
the purchase of an optional Flush Mount kit, Raymarine part number E66067
(for DS400) or E66068 (for DS500).
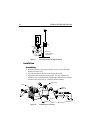
➤ To flush mount the unit directly into the console using the optional kit:
1. Make sure there are no hidden electrical wires or other items behind the
location before proceeding. Make sure there is sufficient rear access for
mounting and cabling.
2. Check the selected location for the unit. A clear, flat area is required.
DS400: allow at least 5½" (140mm) wide by 4¾" in (120mm) high, with
at least 3½" (89mm) of clearance behind the panel.
DS500: allow at least 6¾" (171 mm) wide by 6¼" (159mm) high, with at
least 3½" (89mm) of clearance behind the panel.
3. Using the template supplied at the end of this handbook, trace out the unit
opening and four mounting screw locations.
4. Use a 3-5/8" hole saw to cut the hole through which the circular rear of the
unit will pass.