


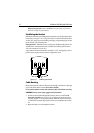


22 DS400 and DS500 Digital Fishfinders
High-speed operation (above 40MPH) may require less projection in
the water to improve performance.
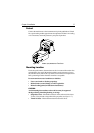
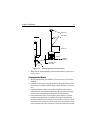
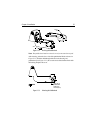
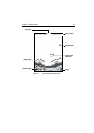
Stabilizing the Bracket
Stabilize the bracket by installing the third bracket screw at the bottom of the
center slot (see Figure 2-11 ). Using a 4mm, #23, or 9/64" drill bit, drill a hole
22mm (7/8") deep. To prevent drilling too deeply, wrap masking tape around
the bit 22mm (7/8") from the point.
Fiberglass hull—Minimize surface cracking by chamfering the gelcoat. If a
chamfer bit or countersink bit is not available, start drilling with a 6mm or
1/4" bit to a depth of 1mm (1/16").
Apply marine sealant to the threads of the #10 x 1-3/4" self-tapping screw to
prevent water seepage into the transom. Tighten the screw.
Figure 2-11: Stabilizing the Bracket
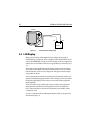
Cable Routing
Route the transducer cable over the transom, through a drain hole, or through
a new hole drilled in the transom above the waterline.
Never cut the cable or remove the connector; this will void the warranty.
CAUTION: Always wear safety goggles and a dust mask.
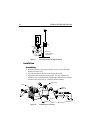
1. If a hole must be drilled through the transom, choose a location well
above the waterline (see Figure 2-10 ). Check for obstructions such as
trim tabs, pumps, or wiring inside the hull. Mark the location with a pen-
cil. Drill a hole using the appropriate size bit to accommodate the connec-
tor.
2. Route the cable over or through the transom.
D6768-1