Radar Operation Manual Page 33
NOTE
This function is only available when a optional compass heading sensor with NMEA 0183 with HDG
sentence is connected to the Chart Plotter.
To select the desired Chart Overlay Mode, follow this procedure:
1. Press [MENU]. Move the ShuttlePoint knob to highlight
CHART FEATURES and press
[ENT].
2. Move the ShuttlePoint knob to highlight
OVERLAY DISPLAY MODE and press [ENT].
NOTE
OVERLAY DISPLAY MODE will be shaded gray and not selectable if a NMEA 0183 compass
sensor is not connected to the Chart Plotter.
3. Select which cartographic objects are to be displayed when Chart Overlay function is
active in Radar Full page. The following chart presets shall be available:
· Full : Full cartographic representation.
· Medium : Includes “Low” settings plus Ports & Services and Auto Chart
Boundaries.
· Low : Includes also area fills, important city names, Nav-Aids & Lights and
Underwater Object icons.
· Minimum : Only the coast lines and elevation objects, no area fill.
· As Cartography : Inherits settings from the current cartography setting.
· Custom : Custom chart representation.
To turn the Chart Overlay On or Off, follow this procedure:
1. Press [MENU]. Move the ShuttlePoint knob to highlight
RADAR and press [ENT].
2. Move the ShuttlePoint knob to highlight
RADAR OVERLAY page and press [ENT].
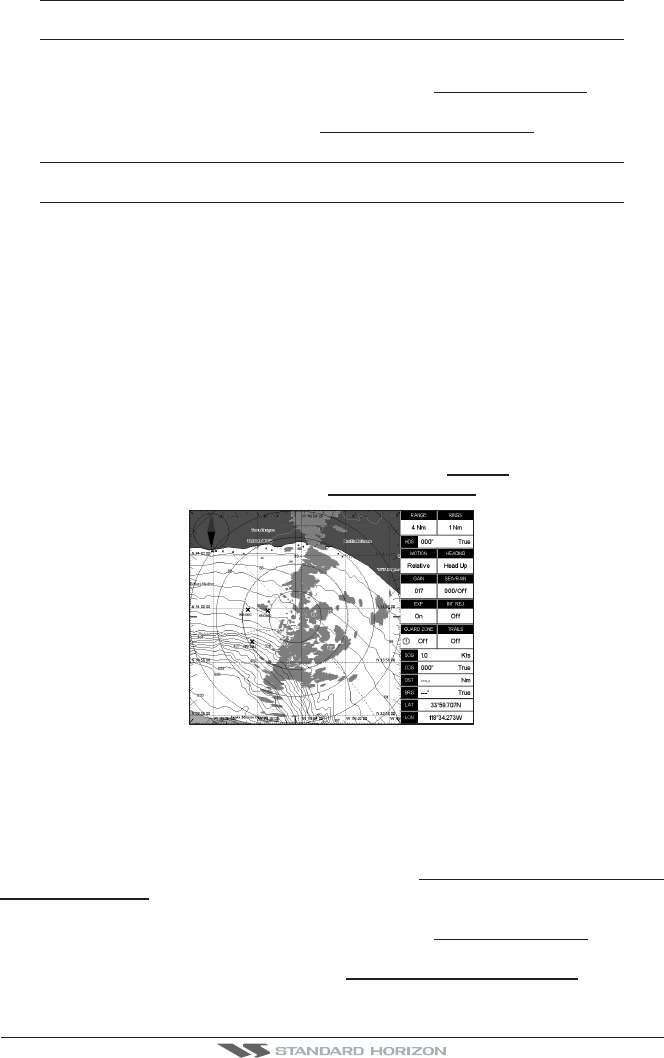
N
E
W
S
Figure 4.4.0 - Chart Overlay
4.4.1 Chart Synchronization (EXCEPT CP180/CP180i)
AVAILABLE ONLY IN THE RADAR CHART SPLIT PAGE
When Chart Synchronization is enabled, the chart display is synchronized to the Radar
display. This function is enabled when Home mode is active (e.g. by pressing [CLR] from
the chart screen). An alert window showing the message
RADAR - CHART SYNCHRONI-
ZATION MODE ON is displayed.
To turn the Chart Synchronization On or Off, follow this procedure:
1. Press [MENU]. Move the ShuttlePoint knob to highlight
CHART FEATURES and press
[ENT].
2. Move the ShuttlePoint knob to highlight
CHART SYNCHRONIZATION and press
[ENT].


