Installing Additional Components
Installing Processors and Memory
Chapter 3
44
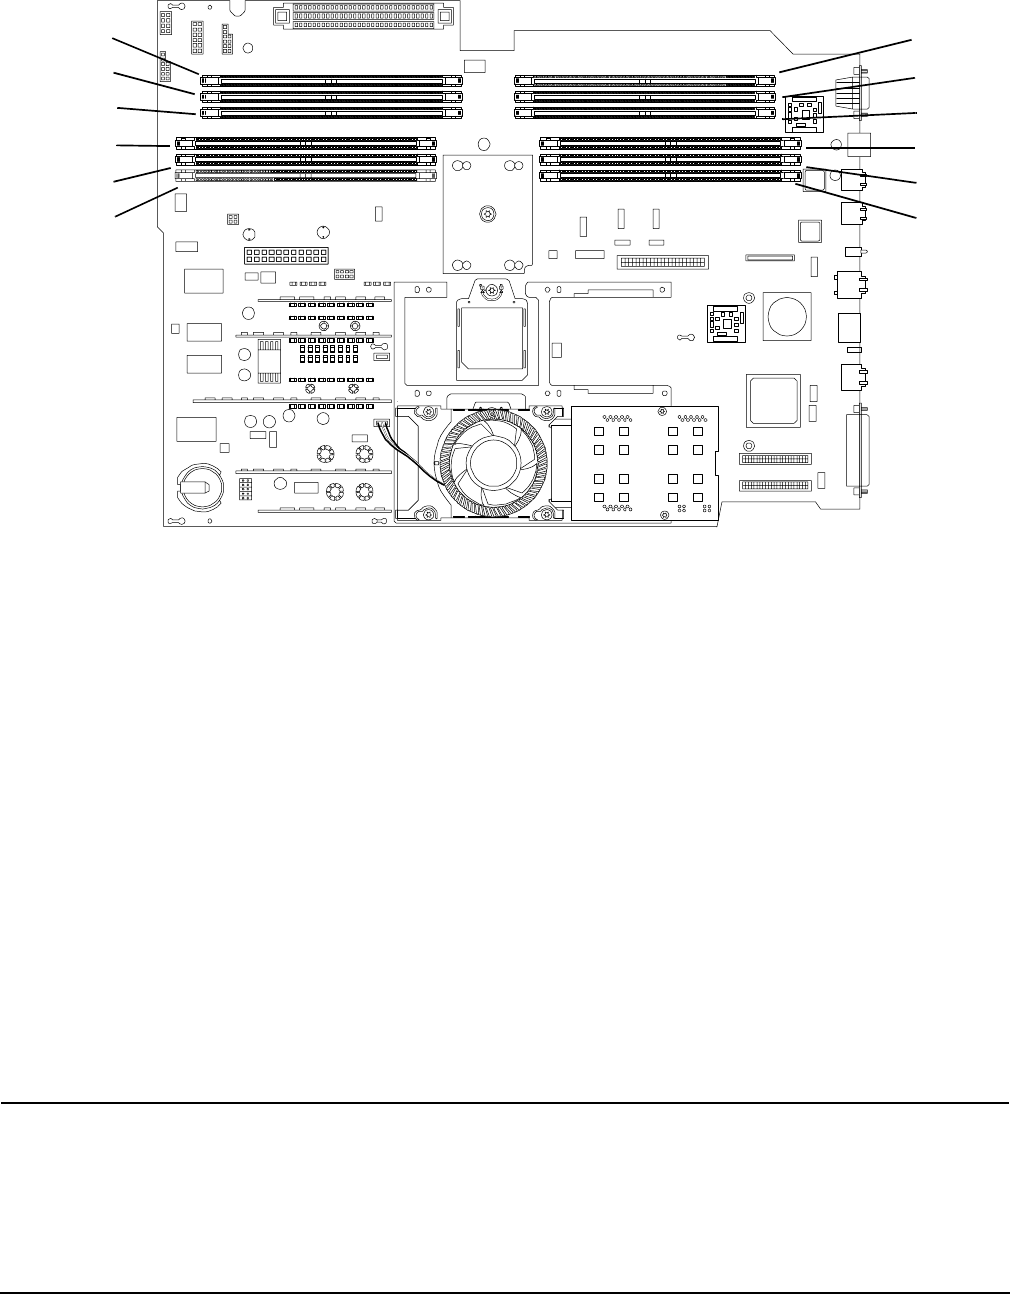
Figure 3-21DIMM Slots
Step 7. Press down on the DIMM retainer clips on either end of the DIMM connector, and lift the DIMM
from the system board socket.
Step 8. If the removed DIMM is functional, store it for future use. (Store the DIMM in a static-free
container.)
Step 9. Repeat steps 6 through 8 for each DIMM to be removed.
Step 10. If DIMMs will not immediately be installed, set the memory airflow guide in position and reinstall
the top cover. Refer to “Replacing the Top Cover” on page 26.
Installing DIMMs
DIMMs must be installed in groups of 4 (quads), and in specific locations. DIMM sockets are shown in
Figure 3-21. The first quad (4 DIMMs) must be installed in sockets 0A, 0B, 1A, and 1B. The second quad must
be installed in sockets 2A, 2B, 3A, and 3B. The third (and final) quad must be installed in sockets 4A, 4B, 5A,
and 5B. If DIMMs of different sizes are to be installed, the smallest DIMMs (least memory) must be installed
in the first quad. DIMMs in the second quad can be equal to or larger (more memory) than the DIMMs in the
first quad. If DIMMs are to be installed in the third quad, they must be equal to or larger than the DIMMs in
the second quad.
To install DIMMs, perform the following steps:
WARNING Voltages and hazardous energy can be present at various locations within the server
whenever a power source is connected. This hazard is present even when the power
switch is in the off position.
Ensure that the system is powered down and all power sources have been
disconnected from the server prior to performing the following procedures.
sysbrd1cpu
0B
4B
2B
0A
4A
2A
1B
5B
3B
1A
5A
3A


