38
Following a Route
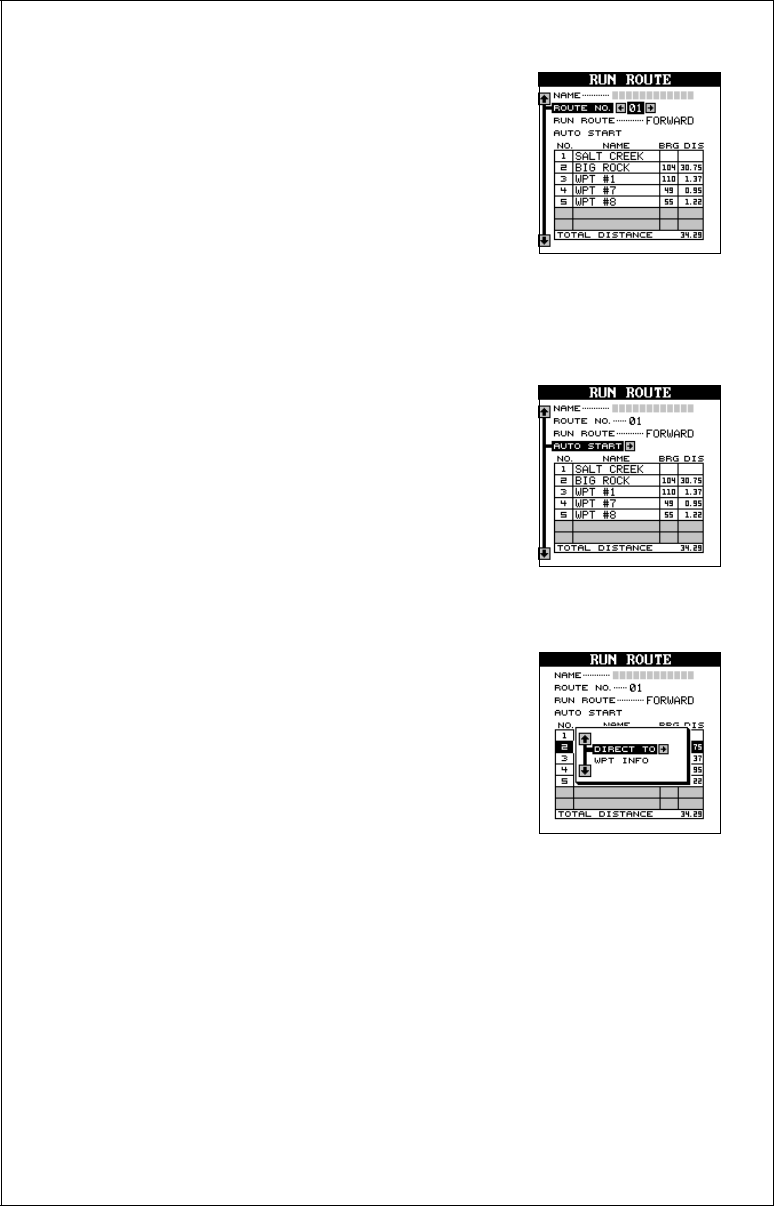
To follow a route, first recall it by pressing the MENU
key, highlighting the “ROUTES” label, then high-
lighting the “RUN ROUTE” label and press the right
arrow key. The screen shown at right appears.
The black box is on the “Route # 01” label. If this
isn’t the route you want to use, press the right or
left arrow keys to switch to another one. Before
starting the route, you’ll need to decide if you want to start at the begin-
ning and travel forward or start at the last waypoint in the route and travel
backwards (reverse) to the first waypoint. The default is forward.
Once you determine which direction in the route
you want to go, you’ll need to determine the first
waypoint in the list you want to start the route. Usu-
ally, it’s the first waypoint, however the AccuMap
12 gives you several options. The default starting
waypoint is the one closest to your present posi-
tion. To use it, simply highlight the “ START AUTO”
label and press the right arrow key. To start the
route using the nearest waypoint to your location,
simply press the ENT key.
You can start at any waypoint in the route by high-
lighting the desired waypoint, then pressing right
arrow key. A new menu appears as shown at right.
The “DIRECT TO” label is highlighted. Press the
right arrow key to start the route with this waypoint.
To view information (latitude/longitude, distance,
bearing, etc.) about this waypoint, highlight the
“WPT INFO” label and press the right arrow key.
Press the EXIT key to erase the waypoint informa-
tion menu.
As you travel to the first waypoint, the unit shows navigation data to that
waypoint. When you enter the radius around the waypoint set by the ar-
rival alarm, the AccuMap 12 automatically switches to the next waypoint
on the list, showing navigation data to that waypoint, and so on until the
last waypoint on the route list has been reached. (Note: The arrival alarm
does not have to be turned on in order to use the route feature.)


