


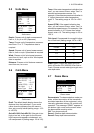


4. INSTALLATION
29
Remarks on installation
• Turn off the engine and anchor the boat
while installing the equipment.
• Install the transducer in the engine room.
• Except for installing the transducer to the
bottom of hull, do not turn on its power so it
may be damaged.
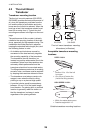
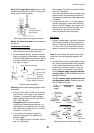
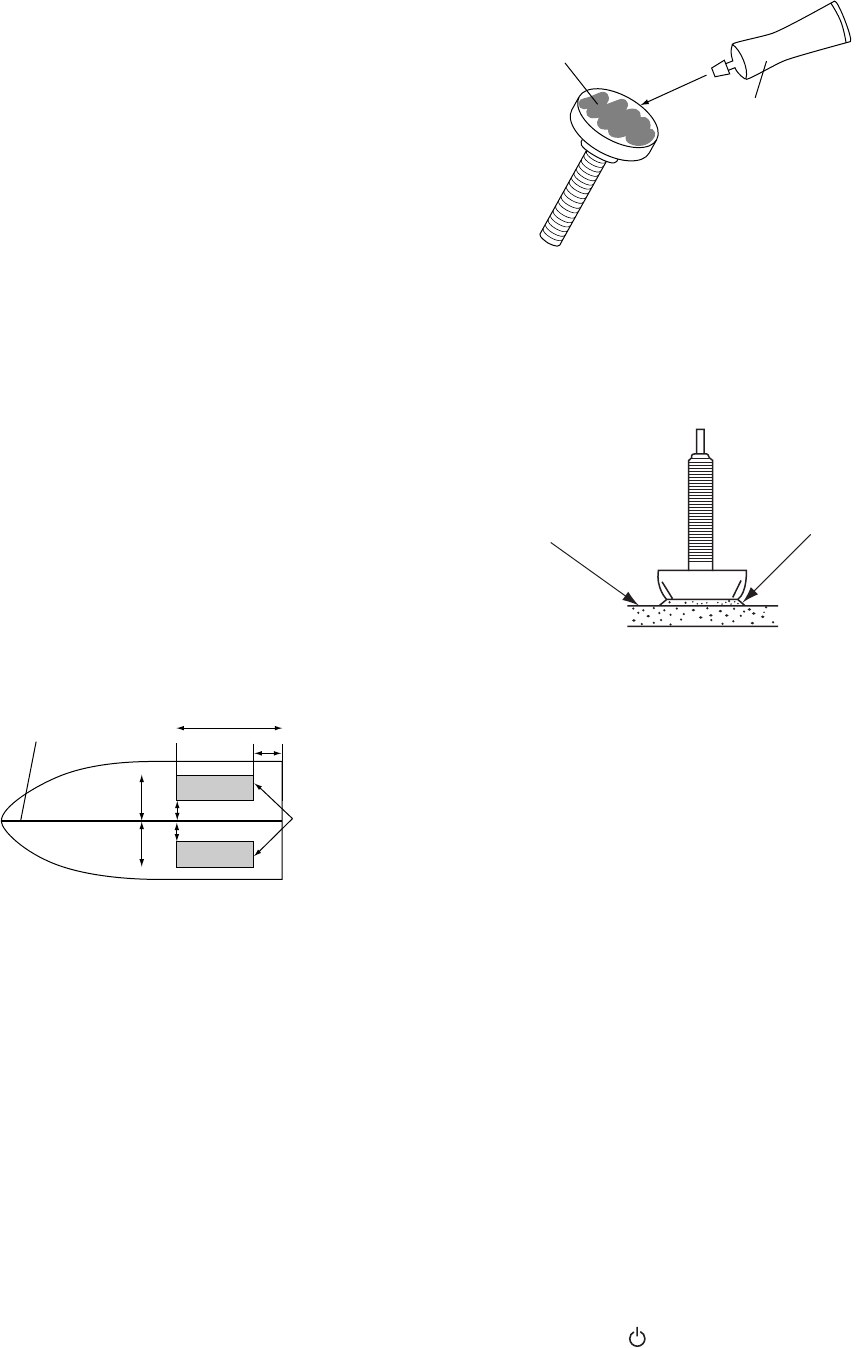
Choosing the mounting location
• The mounting location should be where the
hull is of single-hull thickness and is void of
air or flotation materials other than solid
fiberglass between the transducer face and
the water.
• The mounting location is between 15 to 50
cm from the centerline of the hull.
• Do not place the transducer over hull struts
or ribs which run under the hull.
• Avoid a location where the rising angle of
the hull exceeds 15
°, to minimize the effect
of the boat's rolling.
• You will finalize the mounting location
through some trial and error. The proce-
dure for this is shown later.
Inside-hull transducer mounting location
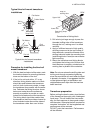
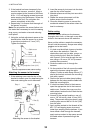
Attaching the transducer
1. Clean the transducer face to remove any
foreign material. Lightly roughen the trans-
ducer face with #100 sandpaper. Also,
roughen the inside of the hull where the
transducer is to be mounted.
2. Clean the transducer face again to remove
scourings.
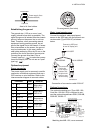
3. Warm the silicone sealant to 40
°C before
usage to soften it. Coat the transducer face
and mounting location with silicone
sealant.
Coating transducer face with silicone sealant
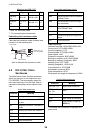
4. Press the transducer firmly down on the
hull and gently twist it back and forth to
remove any air which may be trapped in
the silicone sealant.
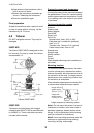
Checking the installation
1. Connect the battery to the display unit.
2. Turn on the display unit.
3. Rotate the MODE knob to choose single
frequency (LF: 50 kHz or HF: 200 kHz).
4. Press the GAIN knob to open the Auto
Gain setting window.
5. Press the GAIN knob to choose Off and
press the
ENTER key.
6. Rotate the GAIN knob to set the gain to "5".
7. Press the RANGE key to open the Range
setting window.
8. Use X to choose Manual.
9. Press the RANGE key continuously to set
the range to 10 meters (feet) and press the
ENTER key.
10.If the bottom is displayed in reddish brown
and the depth indication appears, the
mounting location is suitable. Go to "Final
preparation."
11.If the bottom is not displayed in reddish
brown, the mounting location may be
unsuitable. Do the following:
a)Press the /BRILL key to turn off the
power.
50 cm
50 cm
15 cm
15 cm
1/3
1/2
Transduc
er
mounting
location
Centerline
Transducer
Silicone
Sealant
H
ull
Silicon
e
Seala
nt