


30
10. If the bottom is displayed in dark gray
and the depth indication appears, the
mounting location is suitable. Go to
“Final preparation.”
11. If the bottom is not displayed in dark
gray tone, the mounting location may be
unsuitable. Do the following:
a)
Press the [POWER/BRILL] key to
turn off the power.
b)
Gently dismount the transducer with
a piece of wood.
c)
Reattach the transducer elsewhere
as shown in “Attaching the
transducer.”
d)
Check the installation again.
Final preparation
Support the transducer with a piece of
wood to keep it in place while it is drying.
Let the transducer dry 24-72 hours.
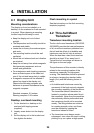
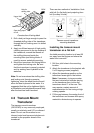
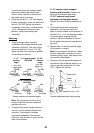
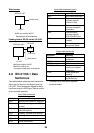
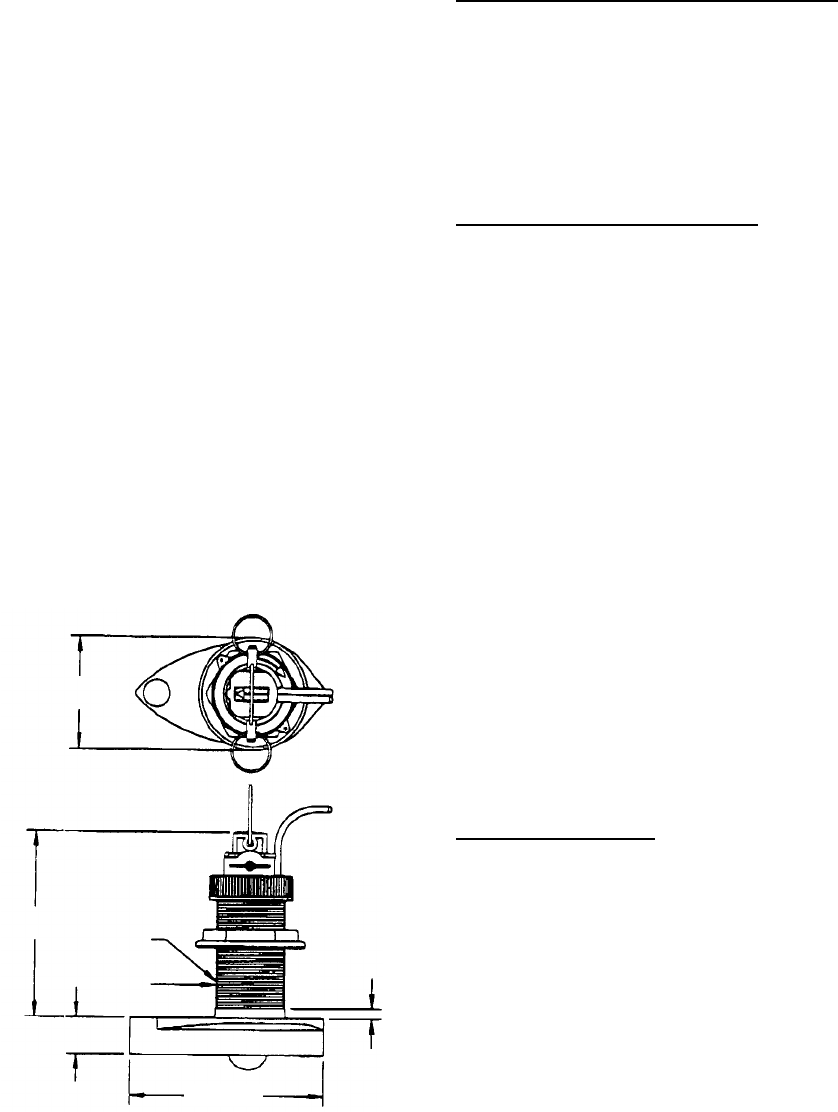
4.5 Optional Triducer
525ST-MSD
The optional triducer 525ST-MSD is
designed for thru-hull mounting. For how to
install this transducer see paragraph 4.2.
φ79 mm
1
33 mm
2.00"-12 UN
threads
φ51 mm
27 mm
7 mm
140 mm
Triducer 525ST-MSD
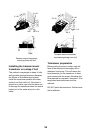
525ST-PWD
The Transom Mount Transducer or
TRIDUCER
®
Multisensor with Integral
Release Bracket 525ST-PWD is
manufactured by AIRMAR Co. These
instructions are included with the sensor.
Pre-test for speed and temperature
Connect the sensor to the instrument and
spin the paddlewheel. Check for a speed
reading and the approximate air
temperature. If there is no reading, return
the sensor to your place of purchase.
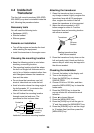
Tools and materials needed
Scissors
Masking tape
Safety goggles
Dust mask
Electric drill
Drill bit for:
Bracket holes: 4mm, #23, or 9/64”
Fiberglass hull: chamfer bit (preferred),
6mm, or 1/4”
Transom hole: 19mm or 3/4” (optional)
Cable clamp holes: 3mm or 1/8”
Screwdrivers
Straight edge
Marine sealant
Pencil
Zip-ties
Water-based antifouling paint (mandatory
in salt water).
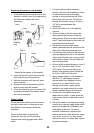
Mounting location
To ensure the best performance, the sensor
must be submerged in aeration-free and
turbulence-free water. Mount the sensor
close to the centerline of the boat. On
slower heavier displacement hulls,
positioning it farther from the centerline is
acceptable.
Allow adequate space above the bracket
for it to release and rotate the sensor
upward.