


HP NetRAID-4M Cluster Services Installation Guide Hardware, Drivers and Utilities
11
NOTE When the Domain Validation feature is enabled, the HP NetRAID-4M controller
performs a series of Read/Write buffer tests to check bus integrity and has the
option of reducing the transfer rate if necessary, until data integrity is ensured.
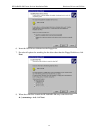
10. Press ESC and confirm to save changes by selecting Yes.
11. On the same server, repeat the preceding steps for any used channels, including SCSI
Channel 1, 2 , and 3. Be sure to use the same SCSI ID as used for Channel 0.
Verify disk drives are operational
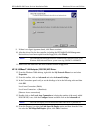
12. Press ESC twice to return to the Main Menu.
13. Select Disk Utilities. Press Enter.
14. Select a Channel# and press Enter.
15. The screen should display all of the drives in the HP RackStorage/12 that are attached to
Channel#. In addition you should see devices on SCSI ID 6 or 7.
NOTE The RackStorage/12 reserves SCSI ID 5 for the enclosure. On each used channel,
SCSI ID 5 displays HP D5989x.
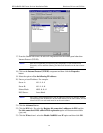
16. Press ESC to back out and select each channel being used to verify that the drives are
being seen.
17. Press ESC and confirm the rebooting of the server by selecting Yes to exit the HP
NetRAID-4M Controller Configuration Utility.
18. After the server starts to reboot, power off the server.
19. Repeat steps 1 – 17 above for Server B. (Be sure to use SCSI ID 6 for Server B).
20. When finished with Server B, leave it powered off.
2.4 Install Windows 2000 Drivers
HP NetRAID-4M Disk Array Controller Driver
1. Verify that the HP RackStorage/12 units are powered on.
2. Power on Server A and allow it to fully boot to Windows 2000 Advanced Server.
3. Log on.
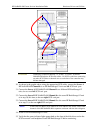
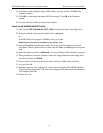
4. Wait for the Found Hardware Wizard screen to automatically appear and then click
Next.
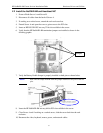
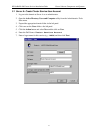
5. Verify the Found Hardware Wizard (as shown below) is prompting to configure a RAID
controller device. Select the option Search for a suitable driver for my device and then
click Next.