


HP NetRAID-4M Cluster Services Installation Guide Cluster Software Components and Quorum
24
3.3 Server B: Install Cluster Services
1. Log onto Server B.
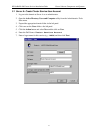
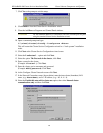
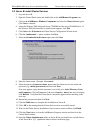
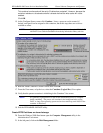
2. Open the Control Panel screen and double-click on the Add/Remove Programs icon.
3. Click on the Add/Remove Windows Components and select the Cluster Service option.
Click Next to continue.
4. Insert the Windows 2000 Advanced Server CD-ROM into the server CD-ROM drive. If
the Windows 2000 Advanced Server splash screen appears, click Exit.
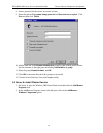
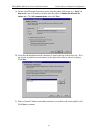
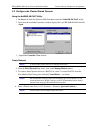
5. Click Next at the Welcome to the Cluster Service Configuration Wizard screen.
6. Click the I understand … option and then click Next.
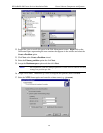
7. Select the Second node in the cluster option and click Next.
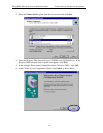
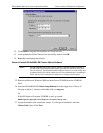
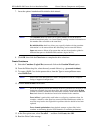
8. Enter the cluster name. (Example: Cluster1)
9. Select the option to Connect to cluster as and enter the cluster service user name and
password (e.g.: MSCS/password) and then click Next.
If an error appears saying that the username is not valid, go to Active Directory Users
and Computers. Click on Users and if the user Cluster Service does not display,
click Refresh. Verify that the Cluster Service username appears before returning to the
next step.
10. Reenter the password and then click Next.
11. Click the Finish button to complete the installation on Server B.
12. Click OK to the message that the Cluster Services have successfully started.
13. Wait for the Cluster Service Installation wizard screen to return and then click Finish.
14. Click the Close button to close the Add/Remove Programs window and then close the
Control Panel window.
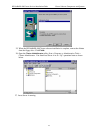
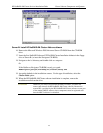
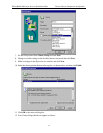
15. Open the Cluster Administrator utility on Server B and you should now see both Server
A and Server B in “Up” operational states as shown on the next page: