


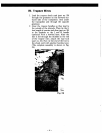
V. Drain Plugs
Both plugs (part no. 20) are the most often
forgotten item during rigging, but among the
most important. Even championship sailors
forget to put thejr drain plugs in once in a
while, but you can't go very far with them out. i
Be sure to check your drain plugs before you
leave shore. Be sure you have gaskets in place
and no sand, or other debris which can permit
leakage, around the opening. Drain plug loca-
tion is next to the lower gudgeon as shown in
Figure 14.
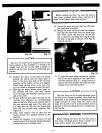
VI. Mast Rigging, Raising and
Lowering
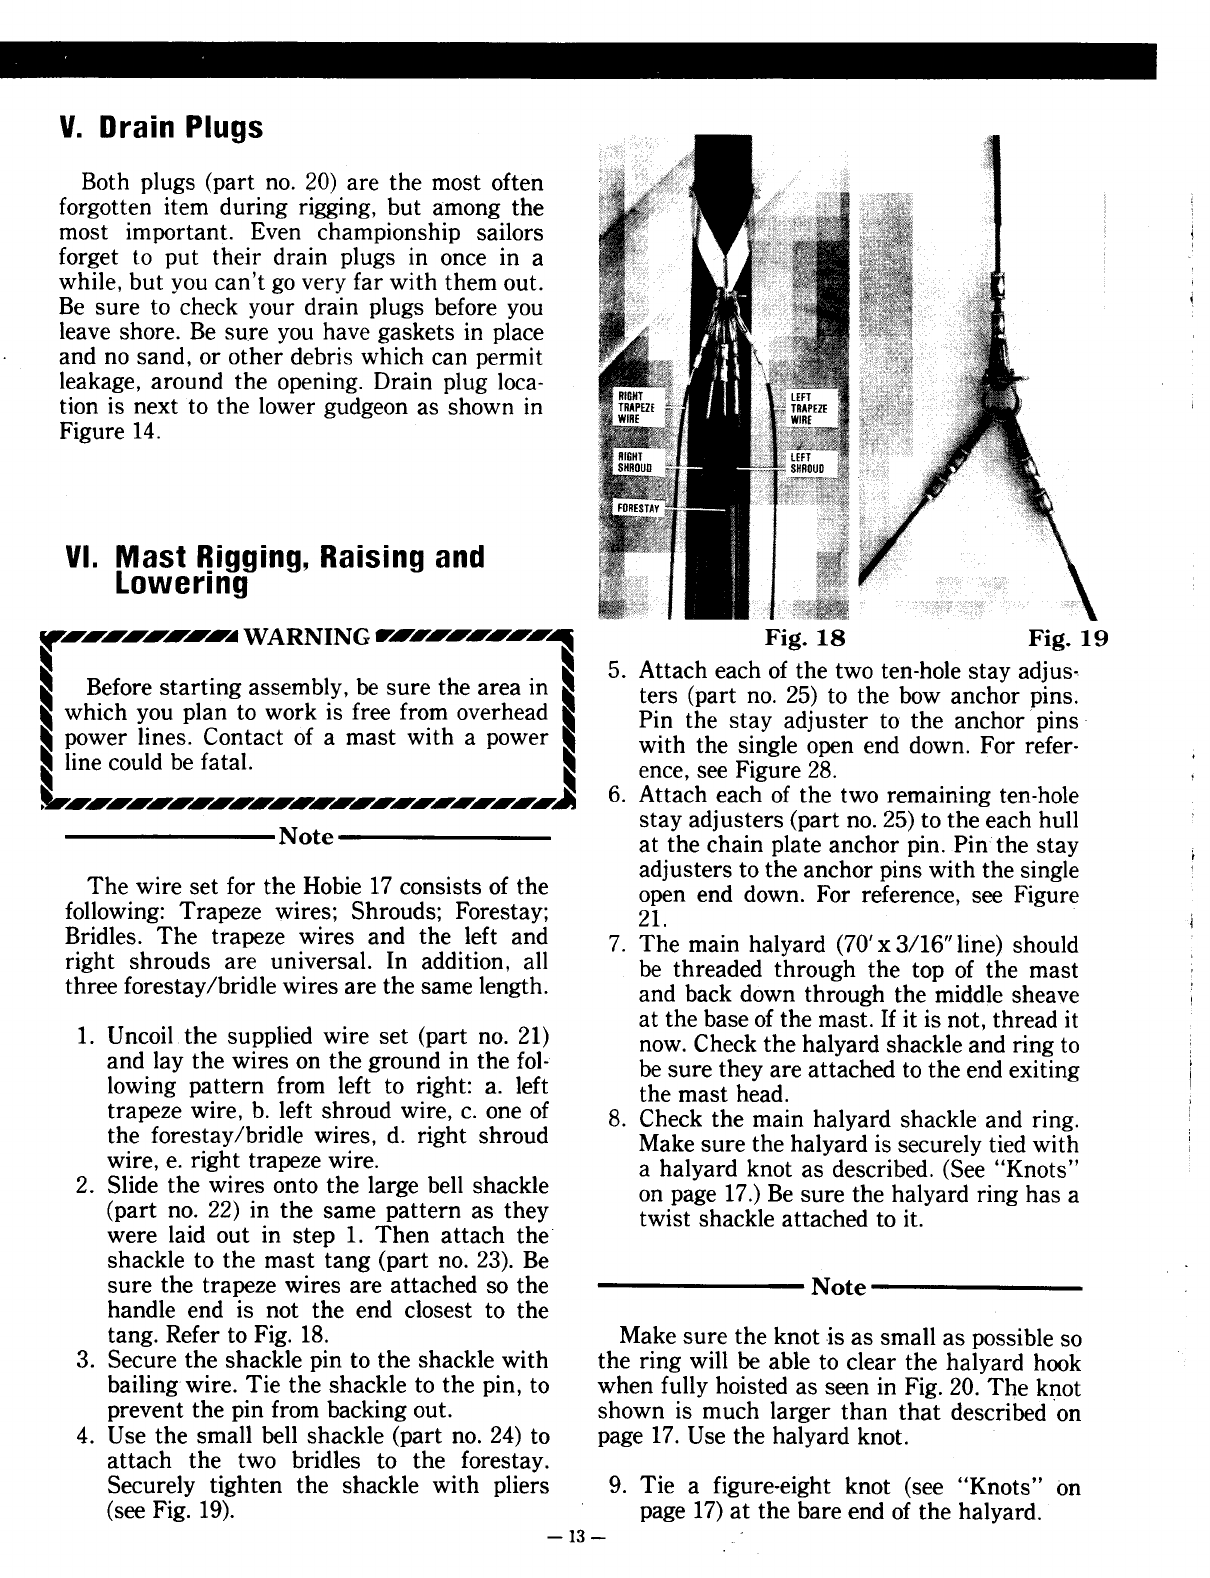
r""""""""""""~ WARNING r""""""""""1 Fig. 18 Fig. 19
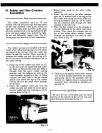
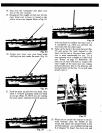
I I 5. Attach each of the two ten-hole stay adjus..
I ~efore starting assembl.y, be sure the area in ~ ters (part no. 25) to the bow anchor pi~s.
~ whIch ~ou plan to work IS free fro.m overhead I Pin the stay adjuster to the anchor pInS
~ power lInes. Contact of a mast wIth a power I with the single open end down. For refer-
I line could be fatal. I ence, see Figure 28. . .
~ "..." 1 6. Attach each of the two remaInIng ten-hole
. stay adjusters (part no. 25) to the each hull
Note at the chain plate anchor pin. Pin the stay t
. .. adjusters to the anchor pins with the single
The WIre set for the Hoble 17 consIsts of the open end down. For reference, see Figure
following: Trapeze wires; Shrouds; Forestay; 21. j
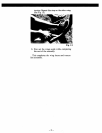
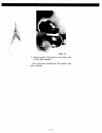
Bridles. The trapeze ':lires and the .l~ft and 7. The main halyard (70' x 3/16" line) should
right shrouds are unIversal. In addItIon, all be threaded through the top of the mast '
three forestay/bridle wires are the same length. and back down through the middle sheave :
at the base of the mast. If it is not, thread it
1. Uncoil the supplied wire set (part no. 21) now. Check the halyard shackle and ring to
and. lay the wires on the groun.d in the fol- be sure they are attached to the end exiting I
loWIng pattern from left to rIght: a. left the mast head. ,
trapeze wire, b.. left s~roud wi~e, c. one of 8. Check the main halyard shackle and ring.
the forestay/brldle WIres, d. rIght shroud Make sure the halyard is securely tied with
wire, e. right trapeze wire. a halyard knot as described. (See "Knots"
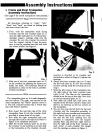
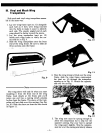
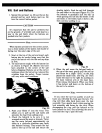
2. Slide the wir~s onto the large bell shackle on page 17.) Be sure the halyard ring has a
(part no. 22) m the same pattern as they twist shackle attached to it.
were laid out in step 1. Then attach the
shackle to the mast tang (part no. 23). Be
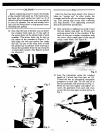
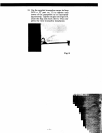
sure the trapeze wires are attached so the Note
handle end is not the end closest to the
tang. Refer to Fig. 18. Make sure the knot is as small as possible so
3. Secure the shackle pin to the shackle with the ring will be able to clear the halyard hook
bailing wire. Tie the shackle to the pin, to when fully hoisted as seen in Fig. 20. The knot
prevent the pin from backing out. shown is much larger than that described on
4. Use the small bell shackle (part no. 24) to page 17. Use the halyard knot.
attach the two bridles to the forestay.
Securely tighten the shackle with pliers 9. Tie a figure-eight knot (see "Knots" on
(see Fig. 19). page 17) at the bare end of the halyard.
-13-