


Page 30 GPS Chart 150C
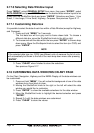
3.7 CREATING AND USING MARKS
Marks can be a stand alone position or can be linked to a Route. The difference
between a Mark and a Waypoint is that when a Mark is contained within a Route and
the Route is deleted, Marks are not deleted, however Waypoints are.
You may place a Mark by
a. Moving the ShuttlePoint knob to a location and pressing “MARK”.
b. To mark you present position, press “MARK”.
c. Moving the Cursor to a location on the chart and pressing “MARK”. Then
enter in the Latitude and Longitude using the EDIT function.
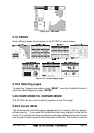
3.7.0 Marks
Every time you place the cursor over a Mark the following functions will be shown on
a pop up box: Delete, Move, Edit, Directory.
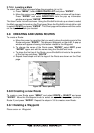
3.7.0.0 Creating a New Mark
From the Chart page
Moving the cursor to a open area on the chart and pressing “MARK” will place a Mark
at that location. An pop up information window will be shown with icon type, name,
coordinates, Distance and Bearing to the current location.
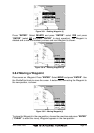
From the User Points List
To select User Points List page follow the procedure (a) or (b):
a. Press “MENU”, select
USER POINTS LIST and press “ENTER”.
b. Move the cursor over a Mark. A pop up information window will be shown.
Press “ENTER” and select DIRECTORY from the pop up information
window and press “ENTER”.
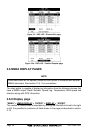
User Points List will be shown. Press “MARK”. A pop up information window will be
shown with icon type, name, coordinates, Distance and Bearing to the current location.
Press “MARK” to accept. The new Mark is added in the User Points List page.
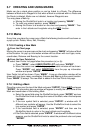
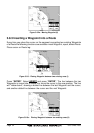
3.7.0.1 Editing a Mark
Place the cursor over the top of the Mark and press “ENTER”. Select EDIT and press
“ENTER”. An information pop up window will appear to modify the icon, name of the
Mark and coordinates of the existing Mark:
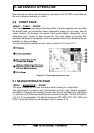
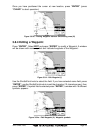
a. Select the name field using the ShuttlePoint knob, press “ENTER” and use
the ShuttlePoint knob to change the name of the Mark, when finished press
“ENTER”.
b. If the icon symbol field is selected, press “ENTER”: a window with 16
different icon symbols will appear. Use the ShuttlePoint knob to select the
icon symbol and press “ENTER”.
c. If the coordinates field is selected, press “ENTER” and then use the
ShuttlePoint knob to enter in the new Latitude and Longitude.
d. If the Color field is selected, press “ENTER”. A window with 8 different colors
appears, use the ShuttlePoint knob to select the preferred color and press
“ENTER”.