Chapter 6 Tutorials
GS2210 Series User’s Guide
51
11 Click the Save link in the upper right corner of the web configurator to save your configuration
permanently.
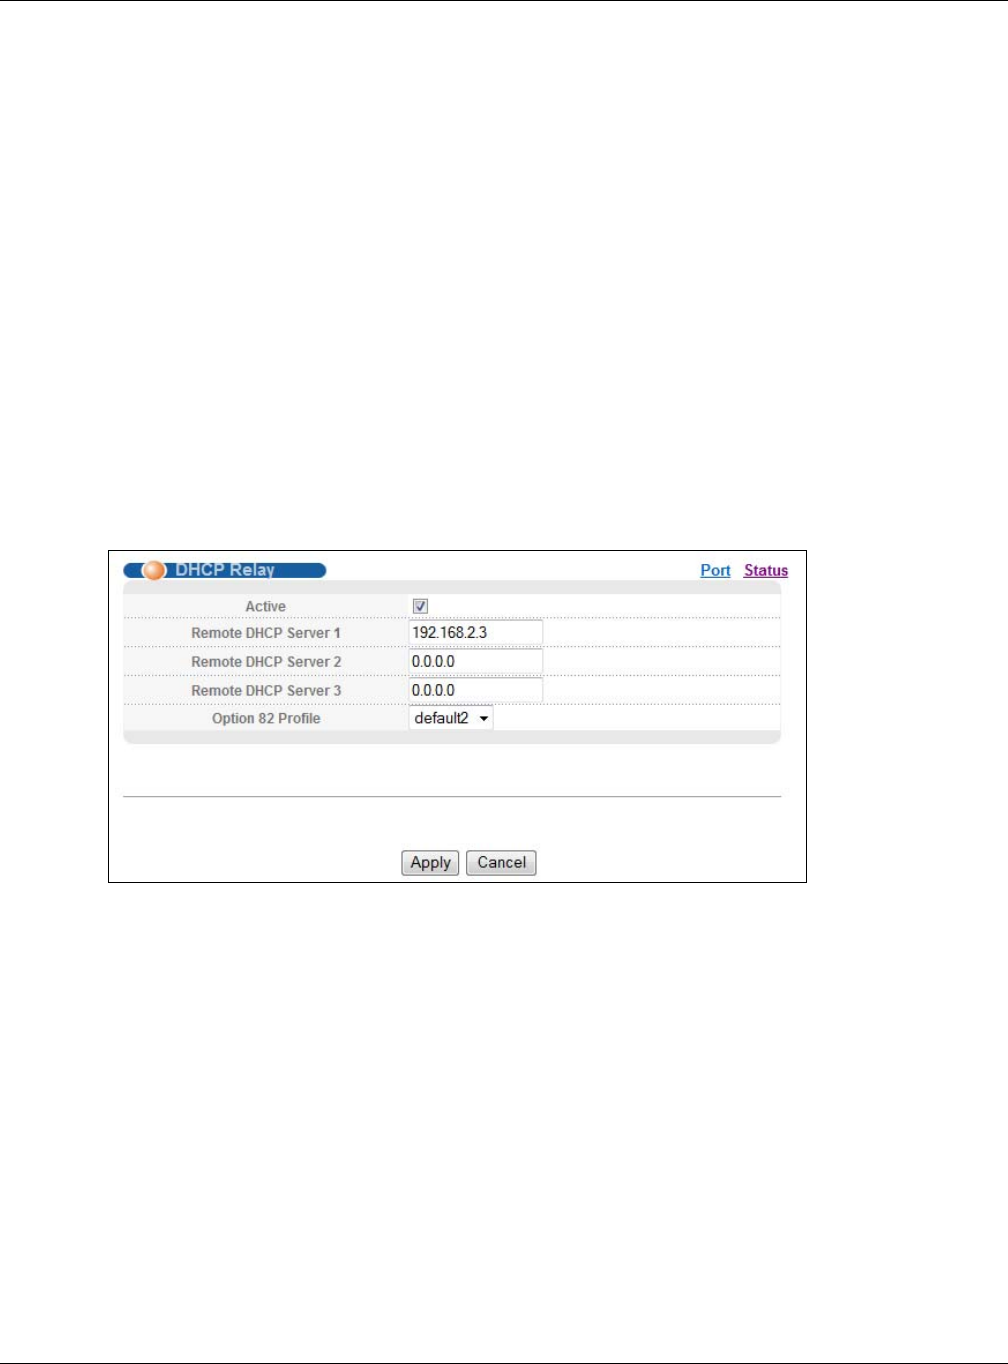
6.3.3 Configuring DHCP Relay
Follow the steps below to enable DHCP relay on the Switch and allow the Switch to add relay agent
information (such as the VLAN ID) to DHCP requests.
1 Click IP Application > DHCP > DHCPv4 and then the Global link to open the DHCP Relay
screen.
2 Select the Active check box.
3 Enter the DHCP server’s IP address (192.168.2.3 in this example) in the Remote DHCP Server 1
field.
4 Select default1 or default2 in the Option 82 Profile field.
5 Click Apply to save your changes back to the run-time memory.
Figure 39 Tutorial: Set DHCP Server and Relay Information
6 Click the Save link in the upper right corner of the web configurator to save your configuration
permanently.
7 The DHCP server can then assign a specific IP address based on the DHCP request.
6.3.4 Troubleshooting
Check the client A’s IP address. If it did not receive the IP address 172.16.1.18, make sure:
1 Client A is connected to the Switch’s port 2 in VLAN 102.
2 You configured the correct VLAN ID, port number and system name for DHCP relay on both the
DHCP server and the Switch.
3 You clicked the Save link on the Switch to have your settings take effect.


