


20
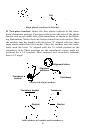
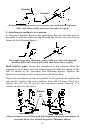
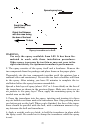
If the transducer's face isn't parallel with the ground, remove and
disassemble the transducer and ratchets. Place the ratchets into the
bracket holes with the letter "B" aligned with the bracket alignment
mark. Place them on the transducer aligned with the 12 o'clock posi-
tion on the transducer stem.
Reassemble the transducer and bracket and place them against the
transom. Again, check to see if you can move the transducer so it's par-
allel with the ground. If you can, then go to step 3B. If it doesn't, repeat
step 2B, but use a different alignment letter until you can place the
transducer on the transom correctly.
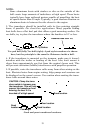
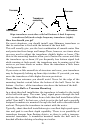
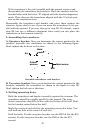
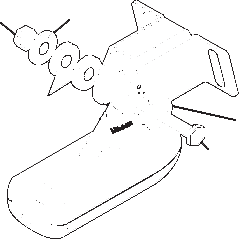
3. Assembling the transducer.
A. One-piece bracket: Once you determine the correct position for the
ratchets, assemble the transducer as shown in the following figure.
Don't tighten the lock nut at this time.
Assemble transducer and bracket.
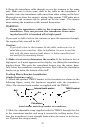
B. Two-piece bracket: Once you determine the correct position for the
ratchets, assemble the transducer as shown in the figure in step 2B.
Don't tighten the lock nut at this time.
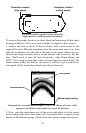
4. Drilling mounting holes.
Hold the transducer and bracket assembly against the transom. The
transducer should be roughly parallel to the ground. The trans-
ducer's centerline should be in line with the bottom of the hull. Don't
let the bracket extend below the hull!
Mark the center of each slot for the mounting screw pilot holes. You
will drill one hole in the center of each slot.
Drill the holes. For the one-piece bracket, use the #29 bit (for the #10
screws). For the two-piece bracket, use the #20 bit (for the #12
screws).
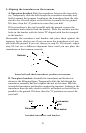
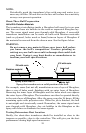
Nut
Metal
washer
Metal washer
Bolt
Rubber
washers