


38
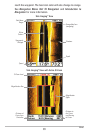
Side Imaging® View
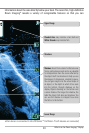
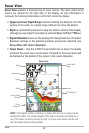
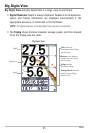
Side Imaging® View shows a shadowed right- and left-looking view from the
boat as the boat passes over the bottom. See What’s on the Side Imaging®
Display and Understanding the Side Imaging® Display for more information
about interpreting the Side Imaging® View.
• Side Imaging® X-Press™ Menu: Press the MENU key once to access
the Side Imaging® X-Press™ Menu. You can choose a side of the water
to view, the sensitivity of the sonar to see more or less detail, the side
beam range, the chart scrolling speed, and the display color scheme.
See Side Imaging® X-Press™ Menu and Understanding the Side
Imaging® Display for more information.
• Display: Add SI Range Lines to the display, or turn on Contour Mode to
change how the water column is displayed. See Sonar Menu Tab: SI
Range Lines and Side Imaging® X-Press™ Menu: SI Enhance for more
information.
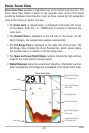
• Freeze Frame: Press any arrow on the 4-WAY Cursor Control key, and
the Side Imaging® View will freeze and a cursor will appear on the
screen. Use the 4-WAY Cursor Control key to move the cursor over a
sonar return, and observe the following:
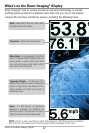
- The depth of the sonar return at the cursor location will be
displayed in the cursor information box.
- Zoom+: Press the ZOOM+ key, and a zoom box will appear and
magnify the area you choose, providing more detail in the
individual sonar returns. The zoom scale will increase or decrease
as you press + or – repeatedly. Press the EXIT key to remove the
zoom box and return to Side Imaging® View.
• Navigation: You can mark waypoints (press the MARK key), start
navigation to a specified waypoint, or navigate to the cursor location. See
Introduction to Navigation: Navigate to a Waypoint or Position for more
information.
- Navigation readouts will display at the bottom of the screen when
navigation starts.
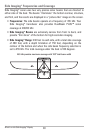
- Boat Icon: When you start navigation, the boat icon at the top of
the screen will indicate the direction the boat needs to turn to
Views