


No Access Under Mounting Location
Follow these steps to deck mount the GPS receiver in a situation where you
must route the cable to the side because there is no space for a cable
underneath the mounting location.
1. Determine the best location, then test route the cable from the
mounting location to the control head.
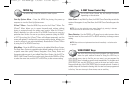
NOTE: AS-EC10 10' extension cables are available from Humminbird® if your
planned routing exceeds 20', (6 m). Maximum cable length, including extensions,
should not exceed 50' (16 m).
2. Confirm the cable length is good and route the cable from the
receiver to the control head. If holes are required to route the cable,
they must be 3/4" (19 mm) to allow for the cable connector. Secure
the NMEA pigtail with electrical tape.
NOTE: Remember to caulk or seal screw holes and drilled holes as needed to
protect your boat from water damage.
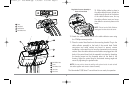
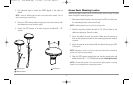
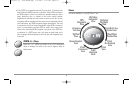
3. The GPS receiver has two wire routing notches. Use the cable notch
closest to the intended cable route.
4. With the cable routed, position the GPS receiver in the planned
mounting location and mark the mounting holes with a pencil or
punch.
5. Move the GPS receiver to the side and drill the two 9/64" (3.5 mm)
pilot holes.
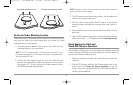
6. Align the GPS receiver's screw holes over the pilot screw holes and
attach with the #8 - 1 1/4" Phillips head screws. Hand tighten only!
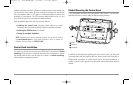
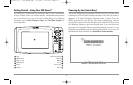
Finish Routing the Cable and
Check GPS Receiver Operation
After installing a GPS receiver, you should perform the following procedure
to finish routing the GPS cable to the control head and to check to make sure
that the control head is working correctly.
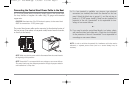
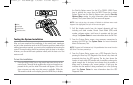
1. Secure the cable along its path to the control head as needed with
cable ties.
2. Plug the GPS receiver cable into the Communications port on the
control head. See Testing the System Installation to use the
System Status start-up option and/or the GPS Diagnostic View to
confirm a good installation.
Access Under Mounting Location No Access Under Mounting Location
12
531569-1_B - 955c ManE.qxp 3/4/2007 5:03 PM Page 12