


4 - 3
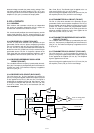
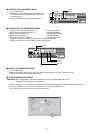
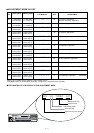
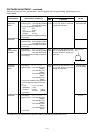
■ ENTERING THE ADJUSTMENT MODE
1 Turn the power OFF.
2 While pushing and holding both [CH-DN] and [CH-UP],
turn ON. Never release [CH-DN] and [CH-UP] until 1
short beep sounds.
3 Push [CH-DN] button, then sounds 2 beep audio.
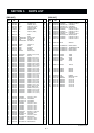
■ OPERATING IN THE ADJUSTMENT MODE
• Change the item (including frequency) (+1). : Push [CH-UP] button.
• Change the item (including frequency) (–1). : Push [CH-DN] button.
• Adjust the specified value (+1). : Push [PRT/BASE] button.
• Adjust the specified value (–1). : Push [MONI] button.
• Change the TX and RX’s condition. : Push [PROG] button.
Change the condition TX reference frequency to RX reference frequency.
Change the condition TX “HIGH POWER” to TX “LOW POWER”.
■ EXITING THE ADJUSTMENT MODE
1 Turn the power OFF.
2 While pushing and holding and [CH-UP], turn ON. Never release [CH-UP] until 1 short beep sounds.
3 Push [CH-UP] button, then sounds 2 beep audio.
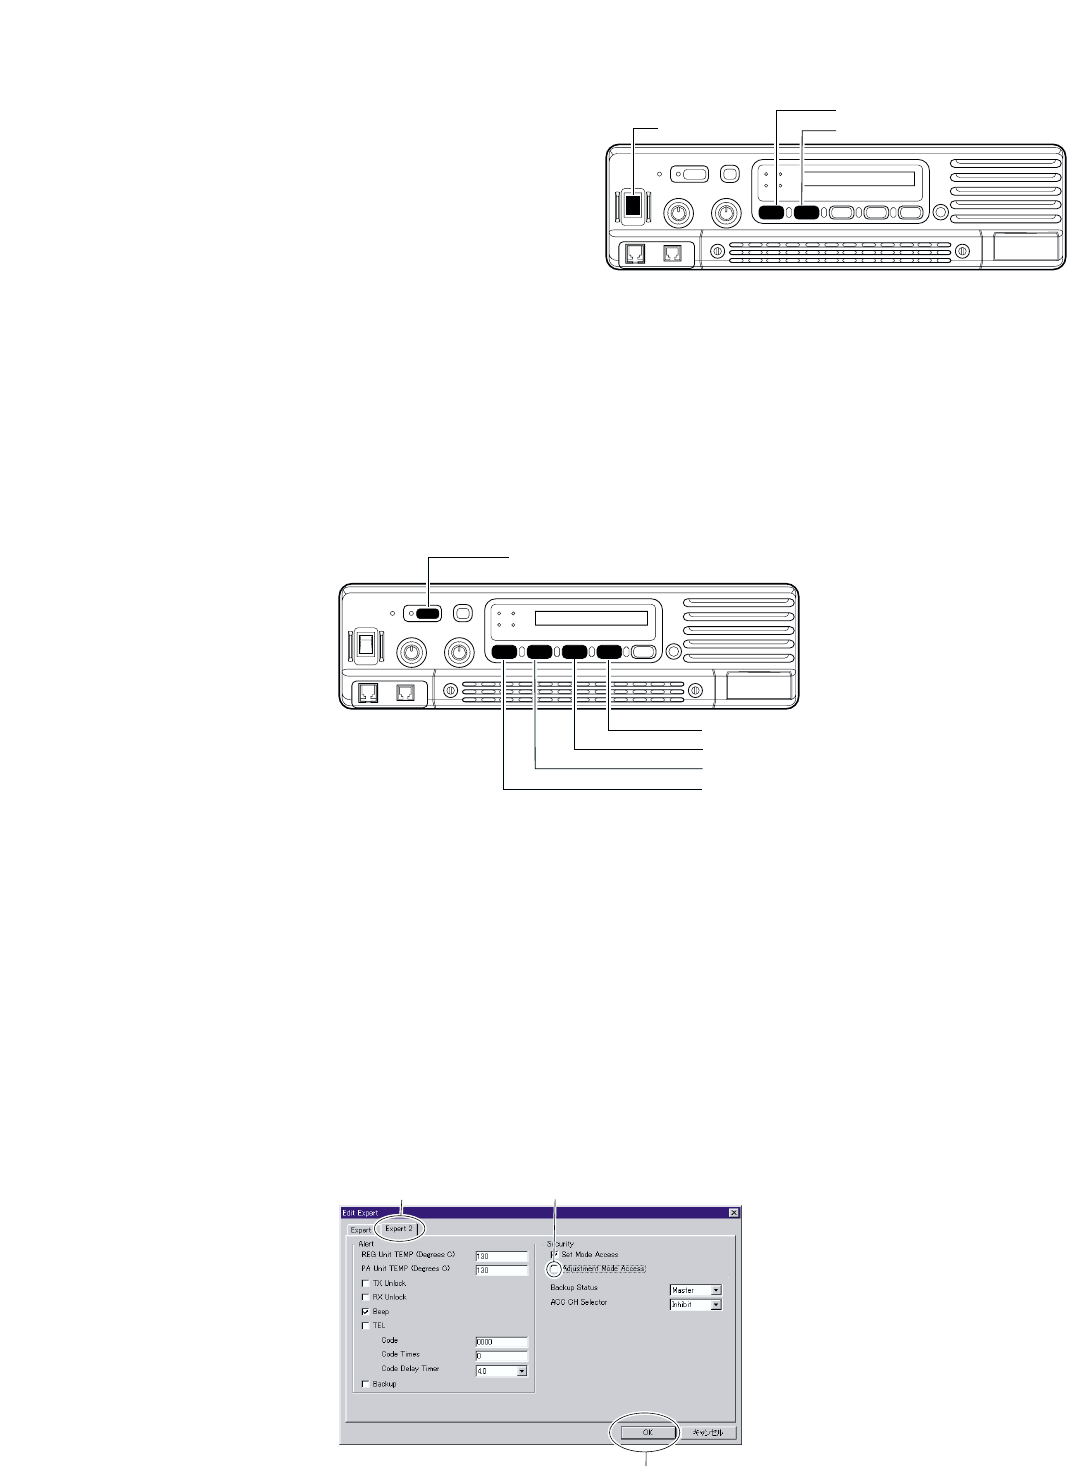
■ AFTER FINISHING ADJUSTMENT
CAUTION!: When the adjustment is finished, the repeater need to be canceled adjustment mode.
Otherwise the repeater does not work properly.
1 Perform the step 1 to 4, described in the PROCESS TO PERMIT “ADJUSTMENT MODE ACCESS” (see page 4-2).
2 Click the “EXPERT 2” tag, then clear the check box for the “Adjustment Mode Access”.
3 Click “OK” button, then cloning with the original memory data.
[POWER]
[CH-UP]
[CH-DN]
[CH-UP]
[CH-DN]
[RPT/BASE]
[MONI]
[PROG]
2
3
2