


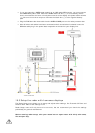
• Press Return.
9.14 Tune the radar
The Navico radar uses a fully automatic tuning procedure that continuously checks for optimum
adjustment during operation. Navico recommends using auto tuning mode for normal operation.
For special situations requiring manual tuning, see the section on "Manual Tuning Mode".
Tune the radar so that the radar receiver frequency matches the transmitter frequency.
For normal operation of a Navico radar, you're recommended to set the tuning mode to Auto.
¾ To tune the unit manually see the section "Manual tuning procedure
for the 6000i or 6100i system". To check the tuning mode or change
it to Auto:
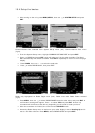
• Press RADAR to display the radar screen on the 6000i or 6100i.
• Press Page 2, Page 3, Page 4, then Install... and then Tune... .
• If necessary, press Tune mode repeatedly until it displays Auto.
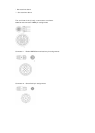
9.15 Set the STC Curve
The STC (Sensitivity Time Control) attempts to compensate for the high strength of nearby
echoes compared with the very much weaker echoes from distant objects. It lowers the receiver
gain when the pulse is transmitted, and raises the gain as echoes return from longer distances.
Ideally, the result is that all echoes are displayed with strengths proportional to the reflectivity of
the objects. A graph showing the receiver gain plotted against time is called the STC curve. You
can select different curve shapes, if required for special applications.
The height of the scanner affects the STC curve shape needed for the sea control to effectively
reduce sea clutter. The STC curve shape corresponds to the scanner's height (in meters) above
the waterline; for example, if the scanner is 20 ft (6 m) above the waterline, select STC curve 6.
Curve 4 is the default, and represents a scanner 13 ft (4 m) above the waterline.
¾ To select a different curve:
• Press RADAR to display the radar screen on the 6000i or 6100i.
• Press Page 2, Page 3, Page 4 then Install... and then Tune... .
• Press STC Curve then use the keypad to enter a curve number from 0 to 8.
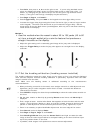
9.16 Set the trigger delay
There are two methods that you can use to set the trigger delay. The two methods should
produce very similar settings. Method 1 is easier to perform but Method 2 may produce more
accurate results. You can use either, or both, methods.
Set the trigger delay after you have restored the factory settings (see "Prepare for calibration")
OR manually turn off the Interference Rejection, Trails and Expand functions.
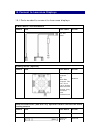
Method 1
¾ Use this method when the vessel is in open water with few or no
nearby echoes.
• Display the main radar screen then press Page 2.
• Press zoom Range - several items to zoom in to the maximum magnification.
• If necessary, press Mode to make it read Manual.
• Press Rain Clutter, then press 0 twice to set the rain clutter value to zero.
• Press Sea Clutter, then press 0 three times to set the sea clutter value to zero.