


Installing the HI400
16
Mounting your inverter
The HI400 inverter must be mounted flat (for example, on or
under a horizontal surface) in order to comply with safety
agency requirements.
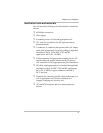
To mount your HI400 inverter:
1. Turn the On/Off switch on the inverter to the off position.
2. Fasten the inverter to the mounting surface, using four
#10 pan head steel wood screw (5/8” long minimum) or
#10 bolts inserted through the mounting holes in the
flanges (running along the sides of the inverter).
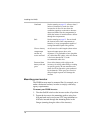
Ventilated See the warning on page 15. Allow at least 5
inches of clearance on each size of the
inverter for air flow. Do not allow the
ventilation openings on the unit to become
obstructed. Make sure the compartment in
which the inverter is installed allows airflow
through the compartment.
Safe See the warning on page 15. Do not install
the inverter in the same compartment as
batteries or in any compartment capable of
storing flammable liquids like gasoline.
Close to battery
compartment
and the AC
source and load
Avoid excessive cable lengths (these reduce
input and output power due to wire
resistance). It is preferable to have lengthier
AC cables than DC cables, as the AC current
is far lower than the DC. Use the
recommended cable sizes.
Protected from
battery acid and
gases
Never allow battery acid to drip on the
inverter or its wiring when filling or reading
its specific gravity. Do not mount the unit
where it will be exposed to gases produced
by the batteries. These gases are corrosive
and prolonged exposure will damage the
inverter.