


Installing the HI400
19
2. Route the lockout signal wire through the cable clamp
and into the hardwire compartment.
3. Strip approximately ½ inch off the insulation of the red
ignition lockout wire and the lockout signal wire (if using
the twist-on wire connectors provided). If you are
providing your own connectors, follow the
manufacturer’s recommendations regarding strip length
and use of the connectors.
4. Connect the lockout signal wire to the red ignition
lockout wire provided in the hardwire compartment.
Check to make sure the wires are making a good
connection, and secure the twist-on wire connector with
electrical tape.
5. Re-install the hardwire compartment cover plate.
6. Tighten the cable clamp so that the AC output cable and
ignition lockout wiring are secured. Check to make sure
the clamp is securing the overall jacket of the AC output
cable (not the individual conductors), and that no wiring
is being pinched in the corners of the clamp.
Connecting the DC cables
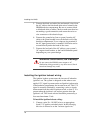
CAUTION
Before making the final DC connection, check cable
polarity at both the battery and the inverter. Positive (+)
must be connected to positive (+); negative (–) must be
connected to negative (–).
Reversing the positive (+) and negative (–) battery
cables will damage the inverter and void your warranty.
This type of damage is easily detected.
WARNING: Fire hazard
Use only appropriately sized copper wire. Make sure all
DC connections are tight. Loose connections will
overheat.