


I.B. 29C892B
Page 18
Effective 8/99
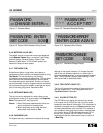
Step 1: Use the On/Off pushbutton to turn the program-
mer on. The baud rate/address of the connect-
ed circuit breaker will automatically be identified
and momentarily displayed (Figure 3 - 4 ), before
the main menu is displayed (Figure 2 - 9 ).
Step 2: Use the R i g h t - A r r o w or Left-Arrow p u s h b u t -
tons to move the cursor to Change Baud/Addr
( B A ) in the main menu (Figure 3 - 1 3 ) .
Step 3: Use the Select pushbutton to enter C h a n g e
Baud/Addr (BA) and the present baud rate and
address of the connected circuit breaker are
displayed (Figure 3 - 1 4 ) .
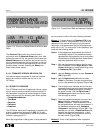
Step 4: The blinking cursor indicates which digit of the
display is active and able to be altered. Use
the Up or Down p u s h b u t t o n s to change the
active number. Use the Right-Arrow or Left-
Arrow p u s h b u t t o n s to move the cursor from
one digit to another.
Step 5: Once the desired baud rate and address are
correctly displayed, hold Save p u s h b u t t o n
depressed and depress Select p u s h b u t t o n.
This simultaneous use of the two pushbuttons
will enter the new baud rate and address. If the
changes are accepted, the display will indicate
the acceptance momentarily before returning
to the main menu (Figure 3-15).
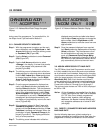
Notice: Keep in mind that a change in the baud rate
and/or address is password protected. Step 5
may require the entry of a valid password
before any changes are accepted. If the pro-
grammer was already turned on, and a valid
password was initially entered as described in
paragraph 3-4 Method 1, entry of a password
will not be required again and the baud rate
and/or address changes will be saved. If a
valid password was not initially entered, the
display will require the entry of a valid pass-
word before any changes can be saved (Figure
3-8). Follow the steps outlined in paragraph 3-
4 Method 2 to enter a valid password.
Notice: Any time a circuit breaker address or baud rate
is changed, verify that the correct address and
baud rate are displayed by using the Right-
Arrow or Left Arrow p u s h b u t t o n s to move the
blinking cursor in the main menu to Find
Baud/Addr (FI). Use the Select pushbutton to
enter Find Baud/Addr (FI), and the newly
assigned address and selected baud rate will
be displayed.
3-6.2 INCOM CONNECTED ADDRESS AND BAUD
RATE
Step 1: If the programmer is INCOM connected and a
Baud Rate and/or Address Change to a net-
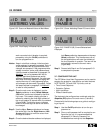
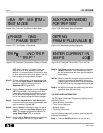
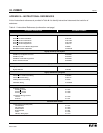
Figure 3-17 Cursor on Setpoints in Main Menu
<RP ME TM SP>
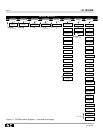
SETPOINTS
Figure 3-18 Initial Setpoints Menu
Figure 3-19 Setpoints Menu with Long Delay Slope
Active
LD LDTI
LD SET
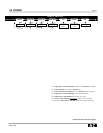
Figure 3-20 Long Delay Slope Present Setting
Displayed
Figure 3-21 Long Delay Slope with New Setting
Displayed
LDA LDS
LD SLOPE I4T
LDA LDS
LD SLOPE
LDA LDS
LD SLOPE I2T