


22
23
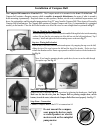
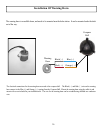
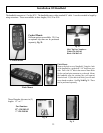
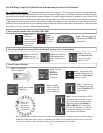
Corded Mount:
Different options are available. TR-1 has
an optional clip than can be purchased
separately, Fig. 29.
Fig. 29
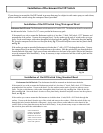
Flush Mount:
Remove the back cover of handheld. Using the back
of the handheld as a guide drill 2 1/4” holes into your
dash. Drill a 3rd 5/8” hole in the center of those holes
for the cord and pico connector to go through. Mount
the handheld using the existing nuts you removed
from the back. If your dash is too thick, you will need
to use thread extenders. See Fig. 30 & Fig. 31. Those
can be purchased separately.
Extender Kit
Thread Extender kit comes in (2)
lengths. 1/2” or 1”.
Part Numbers:
1/2”: 120-2045-02
1” :120-2045-04
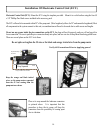
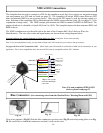
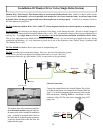
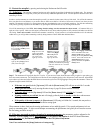
The handheld connects to # 3 at the ECU. The handheld comes with a standard 18’ cable. It can be extended in length by
using extensions. These are available in three lengths; 10 ft, 20 or 30 ft.
Fig. 30
Fig. 31
Flush Mount
Corded Mount
Installation Of Handheld
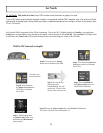
Mic Clip Part Numbers:
White 120-2043-03
Black 120-2043-02