


6.2
ACCESSORIES
CAUTION: BE SURE THE TRANSCEIVER IS
UNPLUGGED AND TURNED OFF BEFORE REMOVING
THE
CASE.
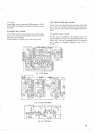
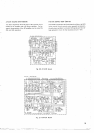
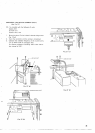
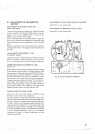
INSTALLING THE CW FILTER
IYG-88C)
(See F~gure 251
Install the filter unit according to the following procedures:
1.
Remove the top cover of the transceiver using a screw-
driver. Care should be used not to break the leads con-
nected between the
2P connector and the speaker on
the cover. Next. remove the
2P connector.
2.
Turn the transceiver upside-down and remove the bot-
tom cover.
3.
Insert the filter in place at the IF unit circuit board on the
left wall
of
the transceiver. Solder the
4
pins from the
rear side using a small size soldering iron. Soldering
should be finished as quick as possible.
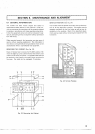
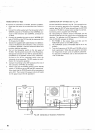
4.
Change the position of the wnnector IIF2) located at
the lower section of the IF unit depending on whether
the FSK shift width is 170
Hz or 850
Hz.
Only SSB filter used
.........................................
A
SSB and CW filters used:
.................
FSK shift 170 Hz (CW filter used)
8
FSK shift
850
Hz
ISSB filter used)
................
C
I
?>(I(?
,114,
I
,,<**,8",a,,,:
..
.....
-
Green
Gray
Purple
NOTE:
1)
If you are not interested in FSK operation. plug in
the connector either to the
"8" position or the "C"
position.
2)
To facilitage the installation of filter and setting of
connector. remove the
3
screws holding the IF unit
fixture to the chassis and then pull the unit upward.
5.
Reconnect the 2P speaker mnnector in position. then
replace the bottom cover and the top cover. The instal-
lation
of
the filter is now completed.
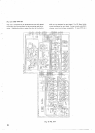
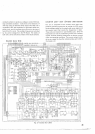
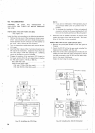
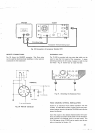
INSTALLING THE DC-DC CONVERTER
IDS-1)
1
Remove the patch plate located on the rear panel of
TS-820
2 Secure the DC-DC
unlt to the rear panel usrng the four
tapplng screws supplled w~th the unlt
3
Select the correct color coded lead from the DC-OC unlt
rnaklng sure that the color code corresponds to that of
the lead connected to the DC-OC
termlnal board adla-
cent to the power transformer
Solder the lead onto the terrnlnal board
/\
Rear
panel
of
Ts-820
Roar
panel
r
Fig.
25
Installing
the
CW Filter
Fig. 26
lnstallrng the DC-DC Cbnverter