


Setup Terminal Emulation Parameters 2-12
Using the AppLock Switchpad 2-13
Using the Keypad 2-13
Using the Touch Screen 2-13
Connecting Bluetooth Devices 2-14
Taskbar Connection Indicator 2-14
Reboot 2-15
Warm Boot 2-15
Cold Boot 2-15
Attaching the Handstrap 2-16
Attach Stylus Tether and Sleeve 2-17
Adjust Headset / Microphone and Secure Cable 2-18
Cleaning the Touch Screen and Scanner Aperture 2-19
Startup Help 2-20
Continuous Scan Mode 2-20
Chapter 3: Connecting Cables to the MX3Plus 3-1
Connect Cable - USB Host 3-1
Connect Cable - USB Client 3-1
Connect Cable - Serial 3-2
Connecting an AC/DC Power Supply 3-3
Connecting Vehicle Power 3-4
DC to DC Power Supply Installation 3-4
Connecting Electrical Cables to Power Sources 3-4
Wiring Schematic 3-5
Connect Vehicle Electrical Connection 3-5
Vehicle Cradle 10.8-16VDC Direct Connection 3-7
Direct Vehicle Power Connection Cable (12 Ft.) 3-7
Connect Power Cable to Vehicle 3-7
Input Power Specifications 3-7
Vehicle Cradle 24/72 Maximum VDC Input Cable Connection 3-8
Vehicle Power Supply, 24 - 72 Maximum VDC (Fuse Not Shown) 3-8
Vehicle Power Supply Footprint 3-9
Connecting the Headset Cable 3-10
Connecting a Tethered Scanner 3-11
Chapter 4: Product Agency Compliance - MX3Plus 4-1
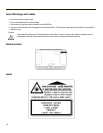
Laser Light Safety Statement 4-3
Lithium Battery Safety Statement 4-5
Vehicle Power Supply Connection Safety Statement 4-7
Chapter 5: Technical Assistance 5-1
ii