


21
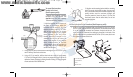
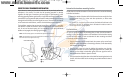
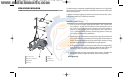
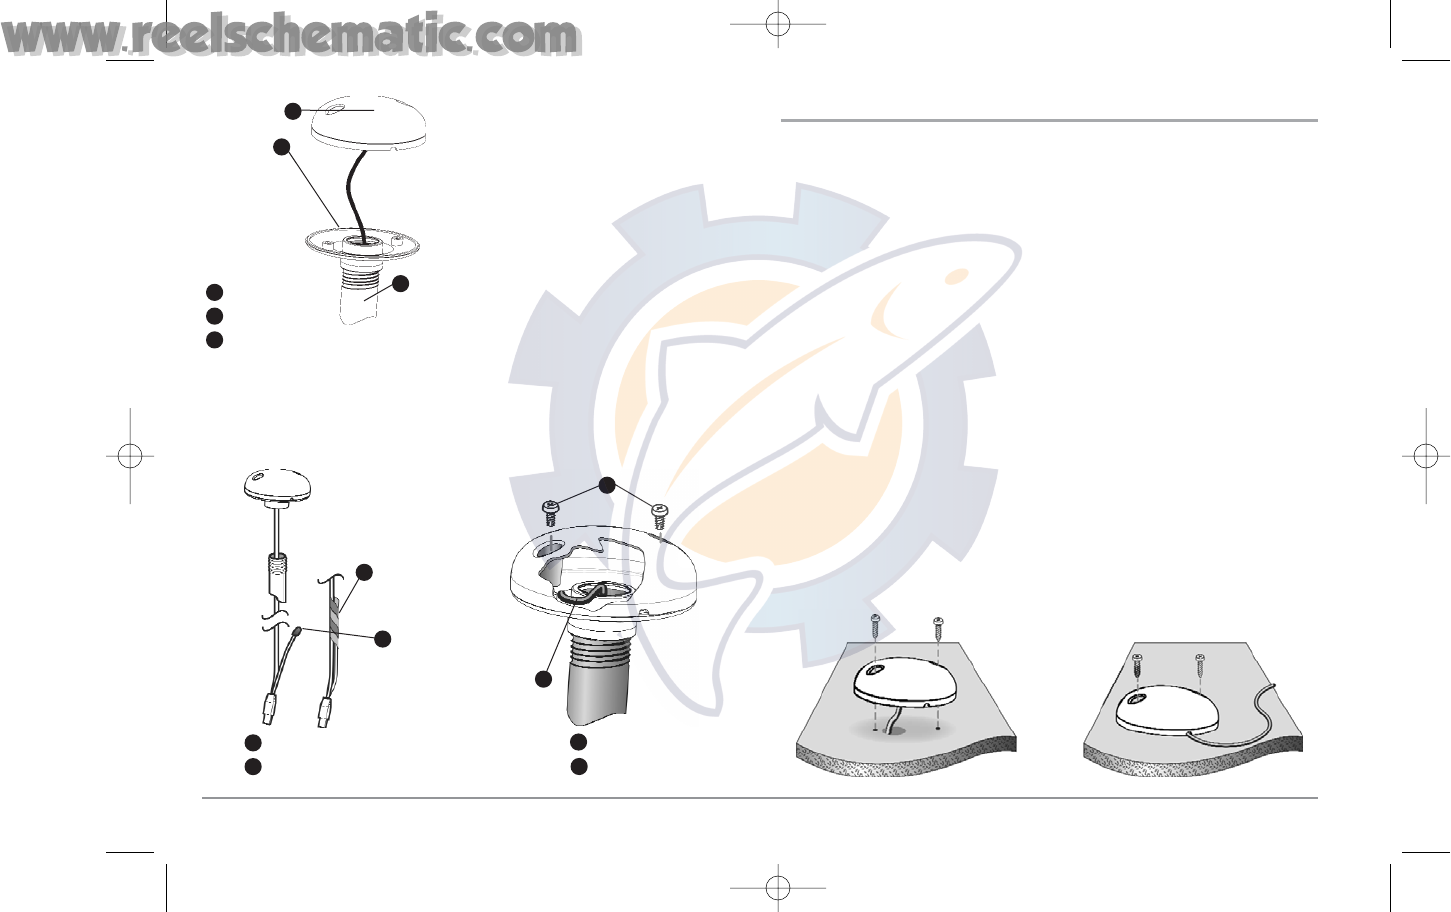
2. Screw on the receiver base to the stem first,
making sure that the stem pipe does not
protrude from the receiver base. This adds
protection to the cable when pulling it through
the pipe stem. In addition to this, de-burr the
pipe edges to reduce cable abrasion.
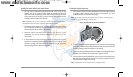
3. Use electrical tape to secure the NMEA pigtail
to the cable as shown.
NOTE: Leave the NMEA pigtail secured to the cable
unless needed. This will make removing the receiver
easier.
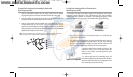
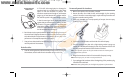
4. Route the GPS receiver cable through the stem and continue with the planned
route you chose in step 1.
5. Attach the GPS receiver to its base using the included #6 - 7/8" screws.
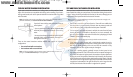
ACCESS UNDER MOUNTING LOCATION
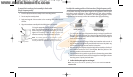
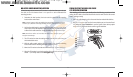
Follow these steps to deck mount the GPS receiver when routing the cable down
through the mounting location:
1. Determine the best location, then test route the 20' (6 m) cable from the
mounting location to the control head.
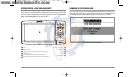
NOTE: Installation details may vary with unit configuration.
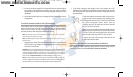
2. Mark the mounting location and drill a 3/4" (19 mm) hole for the cable and cable
plug. Route the cable.
3. Cover the cable hole with the receiver. Make sure the receiver is flush on the
surface and mark the two mounting holes with a pencil or punch.
4. Move the receiver to the side and drill two pilot holes using a 9/64" (3.5 mm) bit.
NOTE: Remember to caulk or seal screw holes and drilled holes as needed to protect your
boat from water damage.
5. Align the GPS receiver screw holes over the pilot screw holes and attach with the
#8 - 1 1/4" Phillips head screws. Hand tighten only!
NOTE: If the mounting surface is thin and made of a lighter material, a backing material
may be needed below the mounting surface.
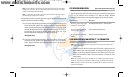
Access Under Mounting Location
No Access Under Mounting Location
NMEA Pigtail Taped
1
NMEA Pigtail Cable Out
2
Mounting Screws
3
Cable Route
4
1
2
3
4
Receiver
1
Receiver Base
2
Stem Pipe
3
1
2
3
93x_Man_531370-1_A - vs4.qxd 2/18/2005 11:11 AM Page 26