


12
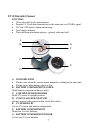
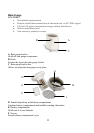
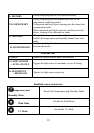
G. Built-in leveler
Allows leveling rain gauge on the surface
H. Bucket see-saw mechanism
Collects the rainfall in one of its containers and self-empties once full
I. Protective screen
Protects the rain gauge funnel from debris
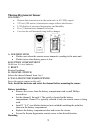
Battery installation
• Unlock the funnel-shaped top on the rain gauge by turning both knobs on the
sides in an anti-clockwise direction.
• Remove the funnel-shaped top lifting it off the rain gauge bucket.
• Remove 7 small screws from the battery compartment cover using a small
Phillips screwdriver
• Insert 2 “AA” size alkaline batteries (not included), matching the polarities as
shown in the battery compartment.
• Replace the battery compartment door and secure the screws.
• Insert the funnel-shaped top into the rain gauge bucket and secure it into place
by turning the knobs clockwise.
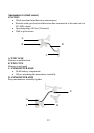
Mounting
• Make sure that the rain gauge bucket is level – check if the ball bearing inside
the bucket is at the midpoint of the leveler.
• Place the protective screen over the top to protect the rain gauge from the debris.
• Mount the rain gauge in place using mounting hardware provided.
• Make sure that the rain gauge is in open area where precipitation falls directly
into the gauge’s bucket, ideally 2-3 feet above the ground.
Placement tips
• The rain gauge should be placed in an open area away from the walls, fences,
trees and other coverings which may reduce the amount of rain falling into the
bucket. Additionally, trees and rooftops may be sources of pollen and debris.
• To avoid the rain shadow effects, place the rain gauge horizontally, on the
distance corresponding to two to four times the height of any nearby obstruction.
• It is important that excess rain can flow freely away from the rain gauge.