


C1561M-A (4/05) 41
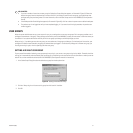
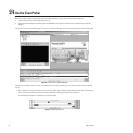
2. Click the date/time in the bottom row of the Event Picker.
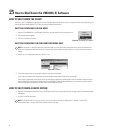
The Event Picker retrieves all the archives for the time period selected. For example, if you specified a date/time down to the hour, all
archives for that hour appear. Each archived alarm or event is represented in the Event Picker as a small vertical bar in the Event row.
The number of retrieved events is given in the bottom row between parentheses.
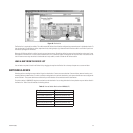
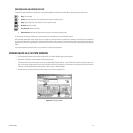
Figure 52. Retrieved Events
The double vertical bar in the Event row is the Picker, which indicates the selected event. The date, time, and description of the selected
event appear in the top row of the Event Picker. Drag the Picker to the left or right to change the Event Picker date/time and to select a
different event. Or, click -Event or +Event to jump the Picker to the previous event or next event.
3. You can browse the archives to locate the ones you want. Refer to the Browsing Archives section in the following pages for instructions.
You can filter the archives by specifying event criteria. Refer to the Filtering Archived Alarms and Events section in the VMX300(-E) Client
Operation Manual. You can also view the details of an archived event. Refer to the Archive View—Details section in the VMX300(-E) Client
Operation Manual for instructions.
BUILDING A DATE/TIME
The Event Picker’s date/time selector allows you to build a date/time starting with the year, then the month, day, hour, and then down to the
minute. Narrow it down as much as you can, and then retrieve the archives and browse or filter to locate the desired events. The date/time
appears in the bottom row of the date/time selector as you build it.
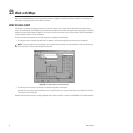
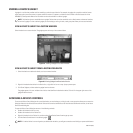
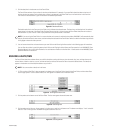
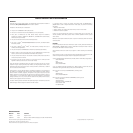
1. If “Click to select a Date/Time” does not appear in the bottom row of the Event Picker, right-click the Event Picker, and then select Clear
from the pop-up menu. “Click to select a Date/Time” will appear in the bottom row of the Event Picker.
Figure 53. Clearing the Event Picker
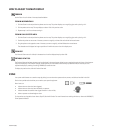
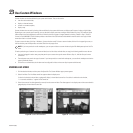
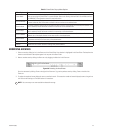
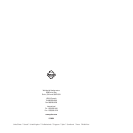
2. Click anywhere on the bottom row of the Event Picker. The Year row appears above the bottom row.
Figure 54. Selecting Year
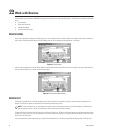
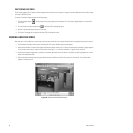
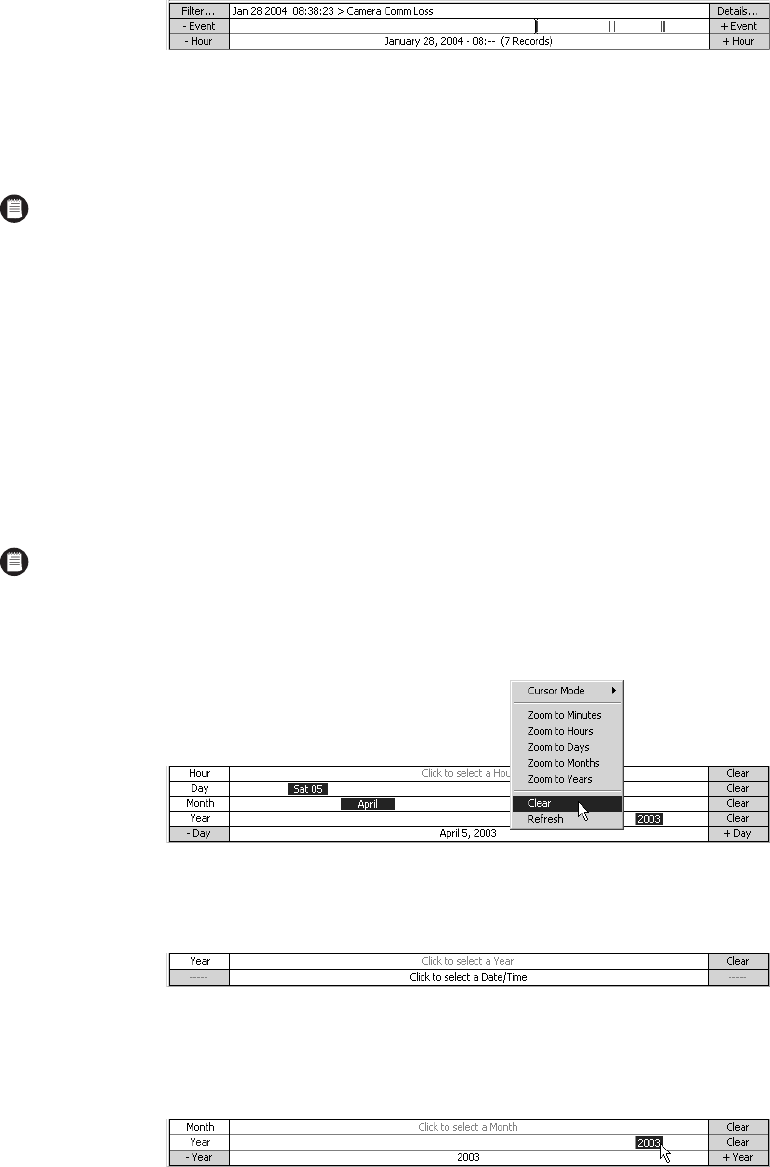
3. Click anywhere on the Year row. A year appears in the Year row, as well as in the bottom row. The bottom row displays “-Year” at the left
end and “+Year” at the right end. The Month row appears above the Year row.
Figure 55. Selecting Month
NOTE: If you are using the Event Picker in a custom window and a camera is switched to the window, VMX300(-E) will automatically load
and play the archived video for that camera, cued to the date/time selected in the Event Picker. Rewind or advance the video using the tools
in the gadget to locate the video you want.
NOTE: You cannot select a date/time in the future.