Installation
20221495F 77
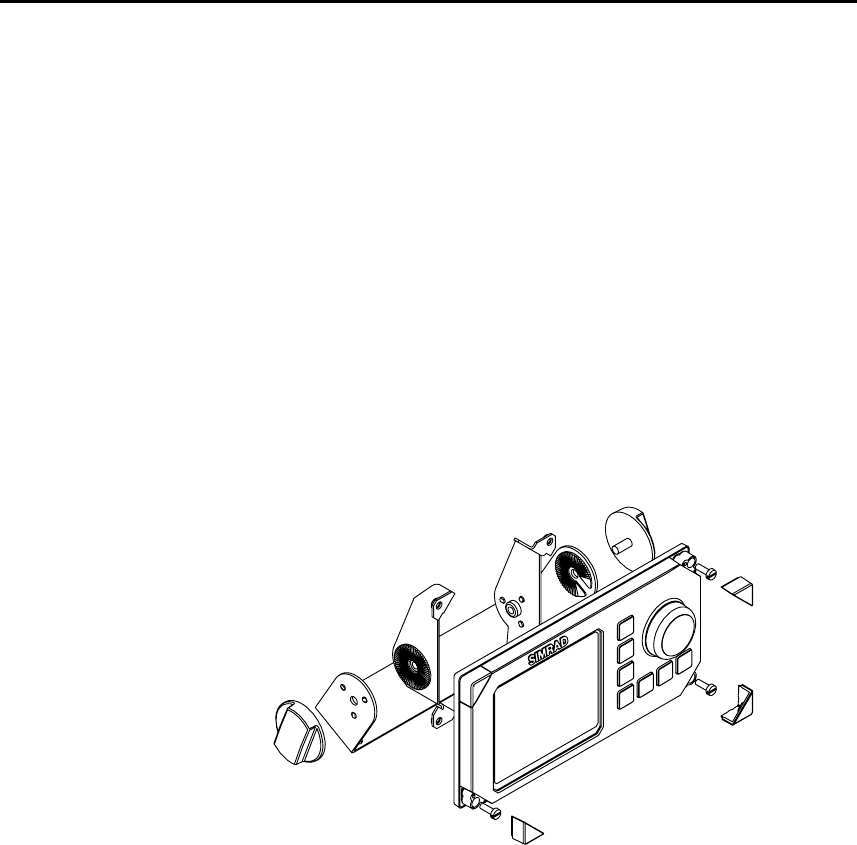
Optional bracket mounting
• Locate the cradle on the mounting site and mark the 4 holes
for the fixing screws on the mounting surface.
• Drill the 4 mounting holes and screw the cradle to the
mounting surface.
• Use the supplied screws to fasten the control unit to the left
and right brackets.
• Apply the front panel corners.
• Use the two locking knobs to assemble the cradle with the left
and right brackets and adjust the control head to best viewing
angle.
• Connect the Robnet2 cable(s) to the control unit connector(s)
(See note on page
78).
Figure 3-8 AP25 Bracket mounting
3.12 ROBNET2 network cables
As Robnet2 units have two Robnet2 connectors (blue) they can
be used as "jack points" for further expansion of the system.
There are no dedicated "in" or "out" connectors. You may
connect the cables to any available Robnet2 connector (blue) on
the specific unit. The Robnet2 connectors have a locking
mechanism for extra safety.
Caution ! Do not mix the blue Robnet2 cables with the yellow SimNet
cables.
The 15 m cable to the autopilot computer has a connector only at
the control unit end. Robnet2 cables with 5 pin male connector at


