


7
Please Do Not Return This Product To The Store. Contact your local Wayne-Dalton dealer. To find your local Wayne-Dalton dealer, refer to your local
yellow pages business listings or go to the Find a Dealer section online at www.Wayne-Dalton.com
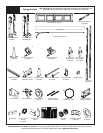
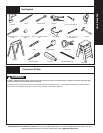
Tools Needed:
Tools Needed:
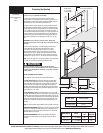
INSTALLATION
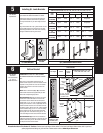
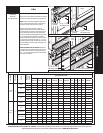
Begin the installation of the door by checking the opening. It must be the same size as the door. Vertical jambs must be plumb and level with header. Side clearance, from
edge of door to wall, must be a minimum of 3-1/2” (89mm) on each side.
IMPORTANT: STAINLESS STEEL OR PT 2000 COATED LAG SCREWS MUST BE USED WHEN INSTALLING CENTER BEARING BRACKETS, END BRACKETS, JAMB BRACKETS,
OPERATOR MOUNTING/SUPPORT BRACKETS AND DISCONNECT BRACKETS ON TREATED LUMBER (PRESERVATIVE-TREATED). STAINLESS STEEL OR PT 2000 COATED LAG
SCREWS ARE NOT NECESSARY WHEN INSTALLING PRODUCTS ON UN-TREATED LUMBER.
NOTE: It is recommended that 5/16” lag screws be pilot drilled using a 3/16” drill bit, prior to fastening.
NOTE: Use this manual in conjunction with the windload specification sheet provided with your door.
Installation
1
None
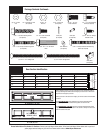
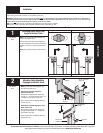
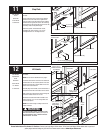
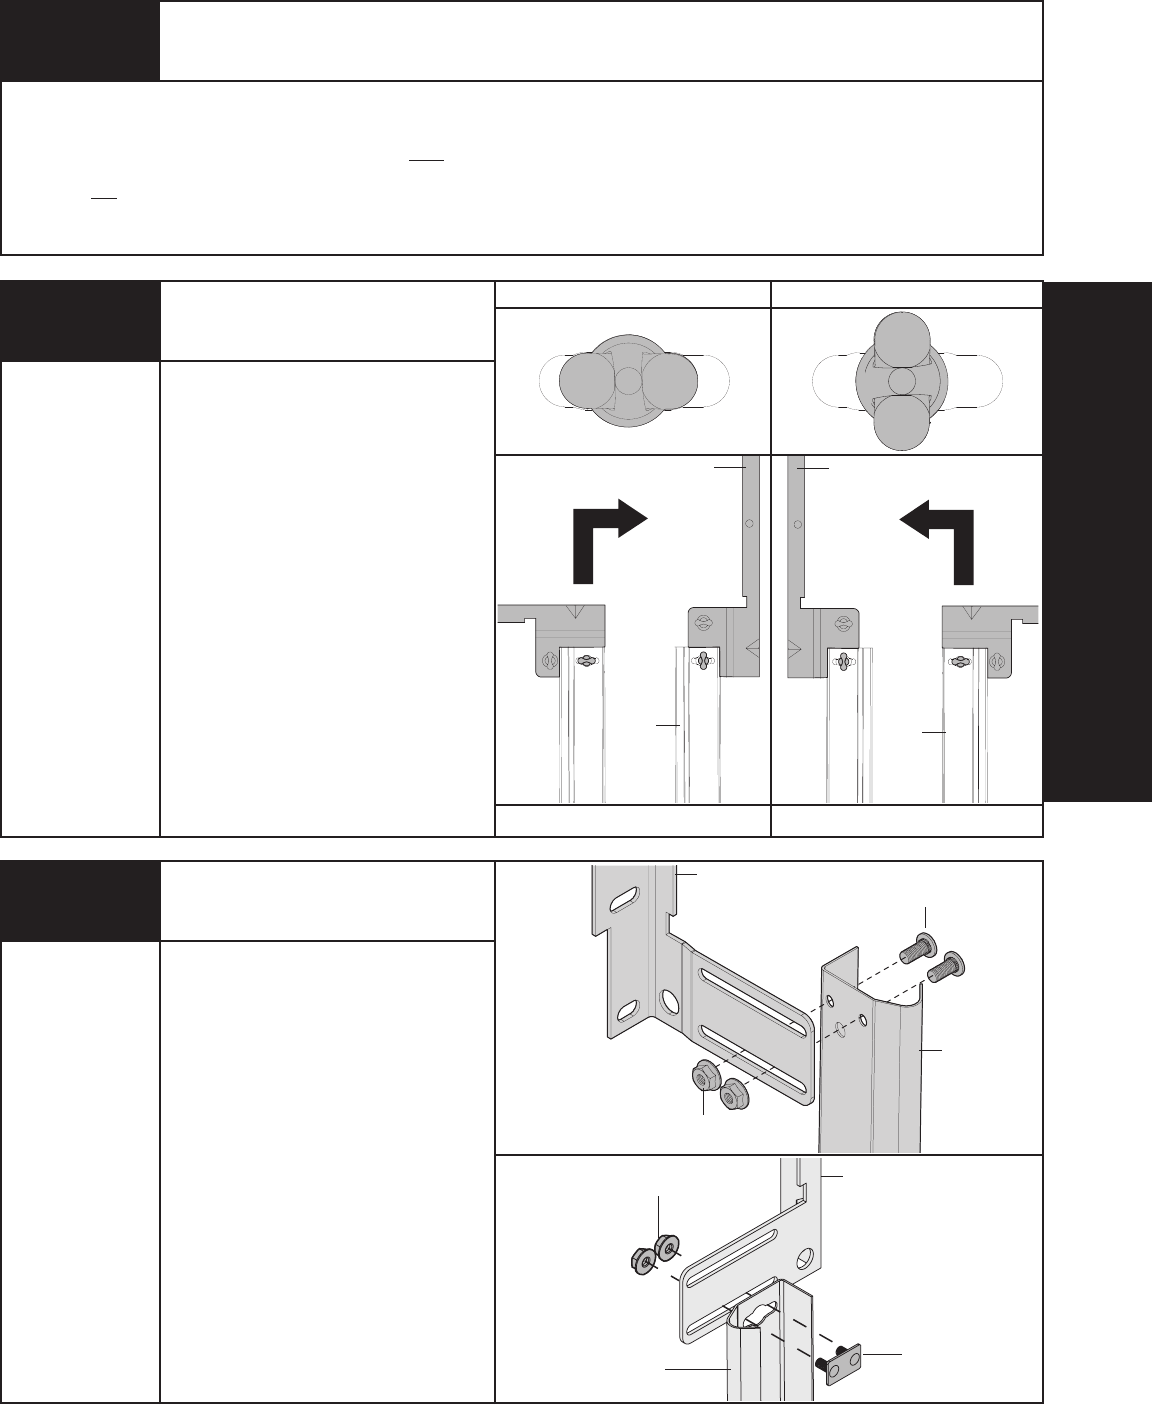
Attaching Quick Install Flag
Angle to Vertical Track
NOTE: If you have fully adjustable flagangles, skip
this step and complete Step 2.
Place the lower quick install tab of the flagangle in
the quick install feature of the vertical track. Give the
flagangle 1/4 turn to lock in place. Repeat for other
side.
NOTE: After completing this step, continue with Step
3.
Quick install tab unlocked
Quick install tab locked
Flagangle
Left hand track and flagangle
Right hand track and flagangle
Flagangle
Vertical
track
Vertical
track
None
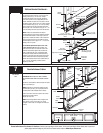
Attaching Fully Adjustable
Flagangle to Vertical Track
NOTE: If you have quick install flagangles, skip
this step and complete Step 3.
Attaching fully adjustable flagangle to
universal vertical track:
Hand tighten the flagangle to the vertical track
using (2) 1/4” - 20 x 9/16” track bolts and (2) 1/4”
- 20 flange hex nuts. Repeat for other side.
Secure the flange nuts after flagangle spacing is
complete (Step 16).
Attaching fully adjustable flagangle to quick
install vertical track:
Hand tighten the flagangle to the vertical track
using (1) stud plate and (2) 1/4” - 20 flange hex
nuts. Repeat for other side.
Secure the flange nuts after flagangle spacing is
complete (Step 16).
2
(2) 1/4”- 20 Flange
hex nuts
Fully adjustable
flagangle
(2) 1/4”- 20 x 9/16”
Track bolts
(2) 1/4”- 20 Flange
hex nuts
Fully adjustable
flagangle
Quick install
vertical track
Stud plate
Universal
vertical
track