


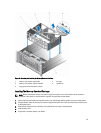

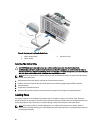

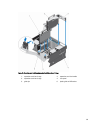

Installing A Cooling Fan
CAUTION: Many repairs may only be done by a certified service technician. You should only perform
troubleshooting and simple repairs as authorized in your product documentation, or as directed by the online or
telephone service and support team. Damage due to servicing that is not authorized by Dell is not covered by your
warranty. Read and follow the safety instructions that came with the product.
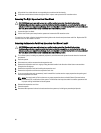
1. Orient the cooling fan such that the connector on the cooling fan aligns with the connector on the fan tray.
2. Holding the tabs on top of the fan, lower the fan into the fan cage until the tabs snap into place.
3. Close the system.
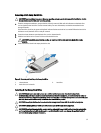
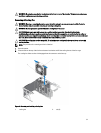
Removing The Fan Tray
1. Turn off the system, including any attached peripherals, and disconnect the system from the electrical outlet and
peripherals.
2. Open the system.
3. Remove the memory risers.
4. Remove the cooling fans.
5. Remove the memory riser and fan cage.
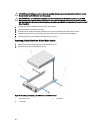
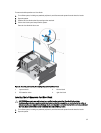
6. Locate the fan board below the cooling fans and beside the processor heat sinks.
7. Using a #2 Phillips screwdriver, loosen the screws in order of the numbers printed on the fan tray (2 on the left and
1 on the right side of the tray) that secure the fan tray to the system board.
8. Disengage the fan tray from the connector on the system board.
9. Lift and remove the fan tray out of the system chassis.
62