


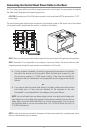
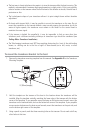


Test and Finish the Transducer Installation
When you have installed both the control head, the transducer, and accessories and have routed all the
cables, you must perform a final test before locking the transducer in place. Testing should be performed
with the boat in the water, although you can initially confirm basic operation with the boat out of the water.
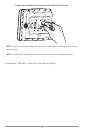
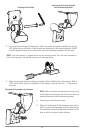
1. Press the POWER/LIGHT key once to turn the control head on. There will be an audible chirp
when the key is pressed correctly. If the unit does not power-up, make sure that the connector
holder is fully seated and that power is available.
2. If all connections are correct and power is available, the control head will enter Normal operation.
If no transducer is detected (or one is not connected), the unit will go into Simulator mode and
will indicate this by displaying the word Simulator on the control head display.
NOTE: The transducer must be submerged in water for reliable transducer detection.
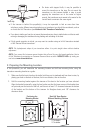
3. If the bottom is visible on-screen with a digital depth readout, the unit is working properly. Make
sure that the boat is in water greater than 2 ft (.6 m) but less than the depth capability of the unit,
and that the transducer is fully submerged, since the sonar signal cannot pass through air.
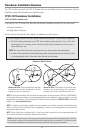
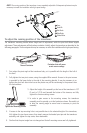
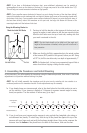
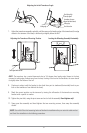
4. If the unit is working properly, gradually increase the boat speed to test high-speed performance.
If the unit functions well at low speeds but begins to skip or miss the bottom at higher speeds,
the transducer requires adjustment. Angling the rear of the transducer downward and/or
lowering the transducer farther into the water will help achieve depth readings at high speeds.
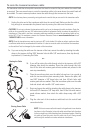
If the left side of the fish arch is longer than the right side, then the back of the transducer is
angled too far downward. If the right side of the fish arch is longer than the left side, then the
back of the transducer is angled too far upwards.
NOTE: Due to the wide variety of boat hulls, it may not always be possible to get symmetrical fish arches and
high speed depth readings at the same time.
NOTE: It is often necessary to make several incremental transducer adjustments before optimum high speed
performance is achieved.
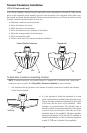
Once you have reached a consistently good sonar signal at the desired speeds, you are ready to lock down
the transducer settings.
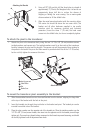
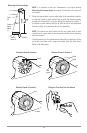
5. Mark the transducer bracket location on the transom with a pencil, then pop up the bracket to
reveal the mounting screws. Tighten the stainless steel mounting bracket screws to secure in
place. Hand-tighten only!
24