


Page 29GX5500S
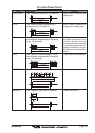
10.12 DUAL WATCH
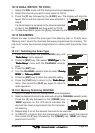
(
TO CH16
)
1. Adjust the SQL knob until the background noise disappears.
2. Select the channel you wish to dual watch to CH16.
3. Press the
[
F
]
key followed by the
[
4
(
DW
)]
key. The display will scan be-
tween CH16 and the channel that was selected in
step 2.
If a transmission is received on the channel selected
in step 2, the GX5500S will dual watch to CH16.
4. To stop Dual Watch press the
[
F
]
key followed by the
[
4
(
DW
)]
key again.
10.13 SCANNING
Allows the user to select the scan type from Memory scan or Priority scan.
“Memory scan” scans the channels that were programmed into memory. “Pri-
ority scan” scans the channels programmed in memory with the priority chan-
nel.
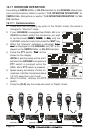
10.13.1 Selecting the Scan Type
1. Press and hold down the
[
CALL
(
MENU
)]
key until
“
Radio SetupRadio Setup
Radio SetupRadio Setup
Radio Setup” menu appears.
2. Press the
[
ENT
]
key, then select “
SCAN TypeSCAN Type
SCAN TypeSCAN Type
SCAN Type” in the
“
Radio SetupRadio Setup
Radio SetupRadio Setup
Radio Setup” menu with the CHANNEL selector
knob.
3. Press the
[
ENT
]
key.
4. Turn the CHANNEL selector knob to select “
PriorityPriority
PriorityPriority
Priority
SCANSCAN
SCANSCAN
SCAN” or “
Memory SCANMemory SCAN
Memory SCANMemory SCAN
Memory SCAN.”
5. Press the
[
ENT
]
key to store the selected setting.
6. Press the
[
CLR
]
key to return to the “
Radio SetupRadio Setup
Radio SetupRadio Setup
Radio Setup”
menu, then press the
[
CLR
]
key again to return to
radio operation.
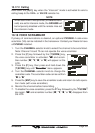
10.13.2 Memory Scanning
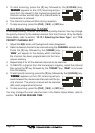
(
M-SCAN
)
1. Adjust the SQL knob until background noise disappears.
2. Select a desired channel to be scanned using the CHANNEL selector knob.
Press the
[
F
]
key followed by the
[
2
(
MEM
)]
key,
“MEM” appears on the LCD which indicates the
channel has been programmed into the transceiv-
ers memory.
3. Repeat step 2 for all the desired channels to be scanned.
4. To DELETE a channel from the transceiver’s memory, select the channel
then press the
[
F
]
key followed by the
[
2
(
MEM
)]
key, “MEM” will disap-
pears from the LCD.