


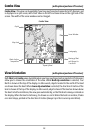

31
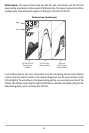
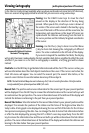
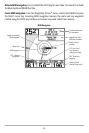
Routes link two or more waypoints together to create a path for navigation, and are used in trip
planning. You can link individual waypoints together by using the GOTO key. A route represents
your intended navigation and shows the shortest path from each waypoint to the next. As you
travel a route, staying on the route line is the most efficient way to get to your destination,
although you should always look out for obstacles not shown on the chart. Your 700 Series™
Fishing System can store up to 50 routes that can each contain up to 50 waypoints.
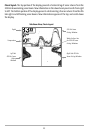
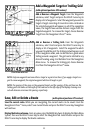
Tracks consist of detailed position history, and are displayed as a breadcrumb trail of trackpoints.
The Current Track shows the position history since the unit was powered up (maximum of 2000
trackpoints displayed). You can clear the Current Track or save it at any time. Your 700 Series™
Fishing System can store up to 10 saved tracks, each containing 2000 trackpoints. The current
track represents your actual path so far.
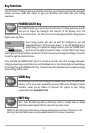
Save, Edit, or Delete a Waypoint (with optional-purchase GPS receiver)
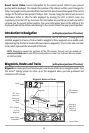
Save your current position as a waypoint: On any view, press the MARK key to save the current
position of the boat as a waypoint.
Save the cursor position as a waypoint: On the Chart or Combo view, use the Cursor key to
designate the position you want to save as a waypoint. Then press the MARK key to save the
marked position as a waypoint.
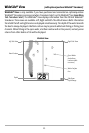
Save a position from the sonar history: On any Sonar view, use the Cursor key to point to a feature
in the sonar history (also called the Sonar Saver feature). Press the MARK key to create a waypoint
at the location where that sonar reading was taken. The new waypoint will also record the depth
at that location.
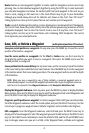
NOTE: When you save a waypoint by any of these methods, a numerical waypoint name is
automatically assigned. You can edit the waypoint information later to give it a different name and
select an icon to represent it (see Waypoint submenu on the Navigation Main Menu Tab).
Display the Waypoints Submenu: From any view, press the MENU key twice to display the Main
Menu System, then use the RIGHT Cursor key to select the Navigation tab. Select Waypoints and
press the RIGHT Cursor key to display the Waypoints submenu.
Program a specific position as a waypoint: To create a waypoint that is NOT your current position,
from the Waypoints submenu, select the Create option and press the RIGHT Cursor key. Use the
Cursor keys to program a waypoint name, latitude, longitude, and icon before selecting Save.
Edit a waypoint: From the Waypoints submenu, select Edit and press the RIGHT Cursor key to
display a list of saved waypoints. Select the waypoint you want to edit and press the RIGHT Cursor
key. Use the 4-WAY Cursor Control key to move from field to field, and the UP and DOWN Cursor
keys to changes values once you are in a field. In the Waypoint Name, Latitude and Longitude