


Chapter 4: Installing the Tiller Pilot 41
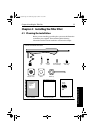
4 Installing the Tiller Pilot
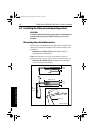
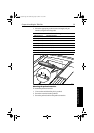
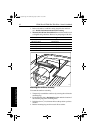
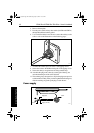
Mounting the tiller bracket
1. Position the tiller bracket on the center line of the tiller (above or
below) and establish the critical dimensions A and B
Note: To measure dimension B on a boat with a sloping rudderstock,
refer to the diagram on page 36.
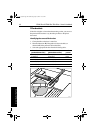
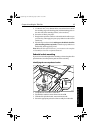
2. Mark the centers of the two bracket mounting holes.
3. Drill two 6 mm (
1
/
4
in) diameter holes through the center line of
the tiller at the positions you have marked.
4. Attach the tiller bracket using two 6 mm (
1
/
4
in) diameter bolts,
nuts and washers.
5. Bond the fixing bolts in place with two part epoxy adhesive
6. When the epoxy is completely hardened, fully tighten the nuts.
7. Attach the tiller pin to the bracket.
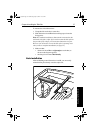
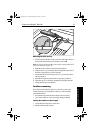
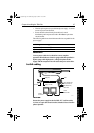
Cantilever mounting
If you need to attach the tiller pilot to a vertical face (such as the
cockpit sidewall), use a Raymarine cantilever socket assembly
(part number D031):
• the maximum possible extension offset is 254 mm (10 in)
• you cut the cantilever to the exact length during mounting
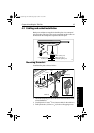
Cutting the cantilever rod to length
1. Clamp the tiller on the boat’s center line.
2. Measure dimension F (actual).
E
D3195-2
81130_3.book Page 41 Wednesday, July 25, 2001 11:57 AM