


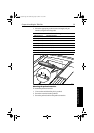

Chapter 4: Installing the Tiller Pilot 43
4 Installing the Tiller Pilot
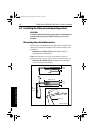
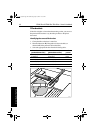
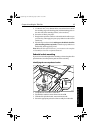
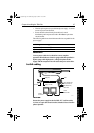
5. Use three 6 mm (
1
/
4
in) diameter bolts, nuts and washers to attach
the mounting ring to the backing plate (with the backing plate on
the other side of the mounting surface, as shown above).
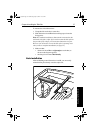
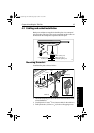
6. Screw the rod firmly into place.
7. Roughen the end of the cantilever rod and the inside of the cap to
provide a key. Then apply two part epoxy adhesive to the rod end
and the cap.
8. Place the cap over the rod end, making sure the hole for the tiller
pilot mounting pin faces upwards. Allow the epoxy adhesive to
harden fully before applying a load.
Note: When the tiller pilot is not in use, you can unscrew the complete
rod assembly to leave the cockpit unobstructed.
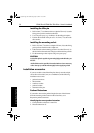
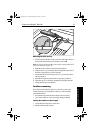
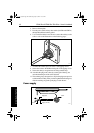
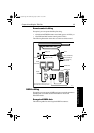
Pedestal socket mounting
If you need to raise the height of the mounting socket to keep the tiller
pilot horizontal, use a Raymarine pedestal socket assembly.
Identifying the correct pedestal socket
1. Clamp the tiller on the boat’s center line.
2. Establish the standard control dimensions A and B.
3. With the tiller pilot horizontal, measure dimension G.
4. Select the appropriate pedestal socket assembly from the table.
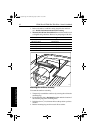
D3197-2
L
G
81130_3.book Page 43 Wednesday, July 25, 2001 11:57 AM