


50
TASCAM DR-100MKII
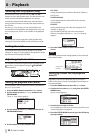
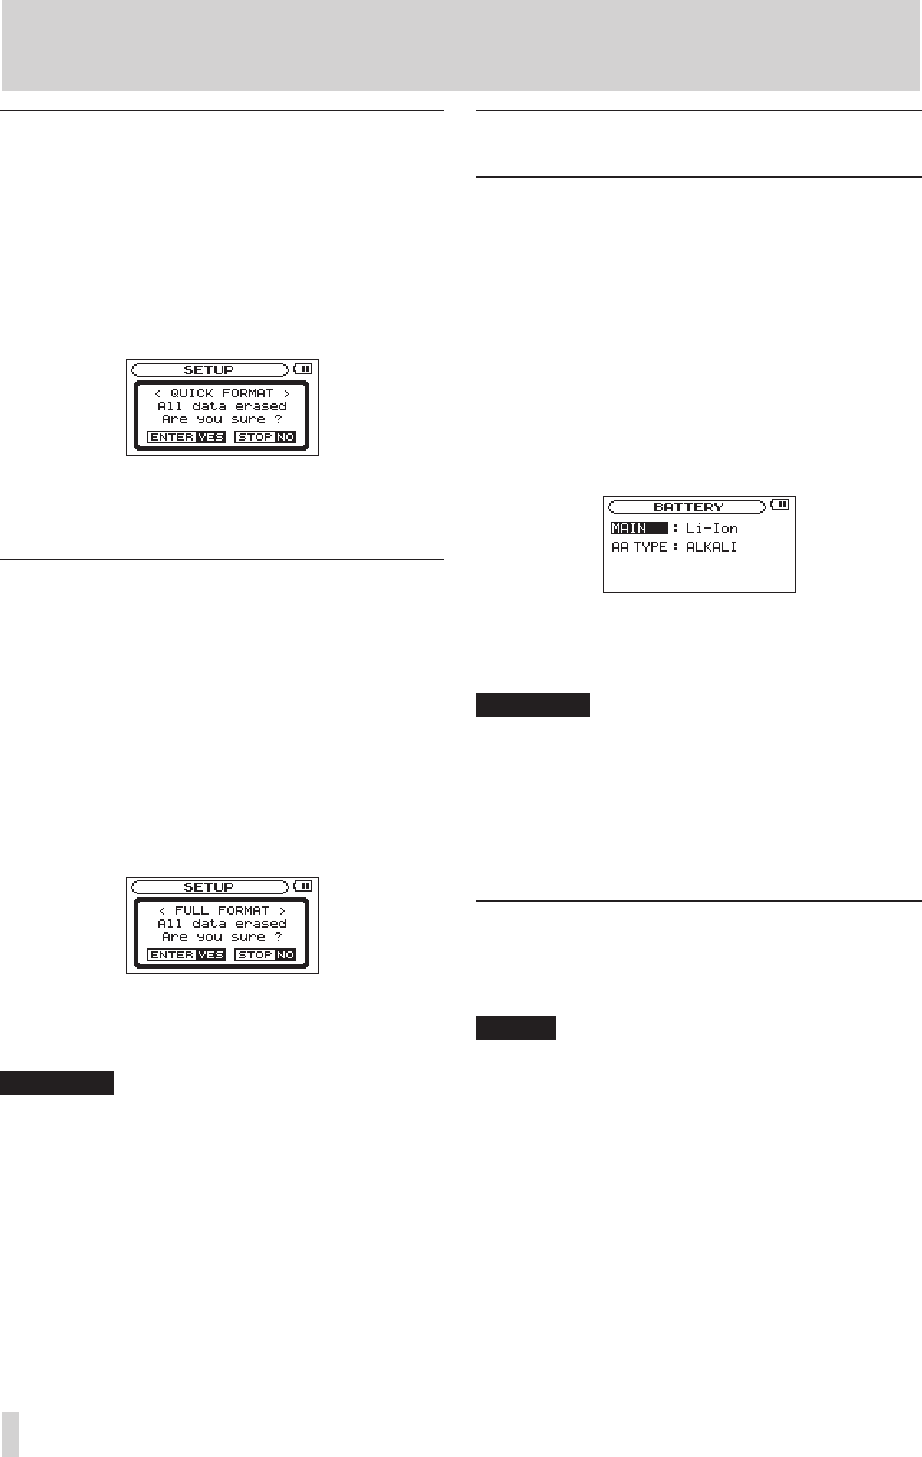
Using QUICK FORMAT
Use the
QUICK FORMAT
item to quick format the SD card.
Using
QUICK
FORMAT
erases all music les on the card and
automatically creates new MUSIC and UTILITY folders as
well as the “dr-1.sys” le that is necessary to use the SD card
with the DR-100MKII.
1 Use the wheel to select
QUICK
FORMAT
, and press the
ENTER/MARK button to highlight
Exec
.
2 Press the ENTER/MARK button to open a pop-up
confirmation window.
3 Press the ENTER/MARK button to execute the quick
formatting, or press the STOP [8] button to cancel
formatting.
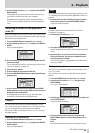
Using FULL FORMAT
Use the
FULL
FORMAT
item to completely format the SD
card.
Using
FULL
FORMAT
erases all music les on the card and
automatically creates new MUSIC and UTILITY folders as
well as the “dr-1.sys” le that is necessary to use the SD card
with the DR-100MKII.
Full formatting checks the memory for errors while
formatting, so it takes more time than quick formatting.
1 Use the wheel to select
FULL
FORMAT
, and press the
ENTER/MARK to highlight
Exec
.
2 Press the ENTER/MARK button to open a pop-up
confirmation window.
3 Press the ENTER/MARK button to execute the full
formatting, or press the STOP [8] button to cancel
formatting.
CAUTION
When formatting a card, the unit should be operating on
AC power supplied through the PS-P520 adapter (sold
separately) or batteries with sucient remaining power. If
the power fails during formatting, the formatting does not
occur correctly.
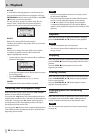
Setting the main battery source
(MAIN)
When both the lithium ion battery and AA batteries are
installed, you can set one as a main power source and the
other as a backup. Usually the unit uses the main power
source.
When the remaining power of the main battery source
becomes low, the unit automatically switches to the
backup, allowing continued operation.
The battery source currently used and the amount of
remaining power it has are shown on the Home Screen.
1 Press the MENU button to open the
MENU
screen.
2 Use the wheel to select
BATTERY
, and press the
ENTER/MARK button.
BATTERY
screen appears.
3 Use the
MAIN
item to set the main battery power
source.
Options:
Li-Ion
(lithium ion battery, default),
AA
CAUTION
The power turns off if the backup battery source does
•
not have enough charge. In this case, all recordings,
settings and other data will be lost.
The power supply will not automatically switch from
•
the backup battery to the main battery. When operating
on the backup battery, reset the main battery selection
after changing it.
Changing batteries when the power is on
If both the lithium ion battery and AA batteries are installed,
you can change batteries while continuing to record and
use other functions.
NOTE
In the following sections, for simplicity we refer to the main
"battery" and backup "battery," even though the unit uses
two AA batteries. Both AA batteries should be changed
together.
Changing the main battery
8
Before changing the main battery, conrm that its charge
has become low enough that power has switched to the
backup battery.
The unit turns OFF if you remove the main battery while it
is being used.
If you must change the main battery even though it is in
use, change the setting so that the backup battery becomes
the main battery and conrm this operation on the Home
Screen rst.
8 – Settings and Information