


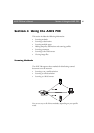


Section 3: Configuring the AXIS 700
AXIS 700 User’s Manual
38
You can edit these profiles or create new ones to specific document
types such as invoices, mailings etc.
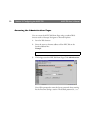
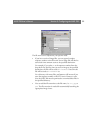
1. Click Scanning Profiles to create and edit the scanning profiles.
2. The previously added scanning profiles are listed in the table. The
Profile Name is the text that appears in the scanning profile list on
the AXIS 700 interface. Click the Profile Name link to edit an
existing scanning profile.
3. Click New Profile to add a new scanning profile to the list.
4. If you permit the users to add temporary scanning profiles, the five
most recently added ones will appear in the list. You can make
temporary profiles permanent by clicking Make Permanent .
5. To change the default profile settings, i.e. the paper size, click Profile
Defaults and change the settings.
6. If you need to restore the predefined scanning profiles, click Restore
Predefined Profiles. Note that all your current scanning profiles will
be lost.
Note:
Not all combinations of settings are possible. If you try to use a
combination that is not valid, the AXIS 700 will display an error
message.
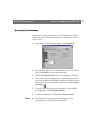
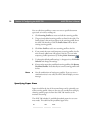
Specifying Paper Sizes
Paper sizes define the size of the scanned image and is optionally part
of the scanning profile. However, the user can override that setting by
choosing another paper size from the AXIS 700 interface at the
moment of scanning.
The AXIS 700 includes 12 predefined standard paper sizes to cover
most needs. This table lists the predefined paper sizes:
Name Width Length
A3 11.69” 16.54”
A4 8.27” 11.69”