


2. WIRING
2-7
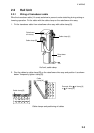
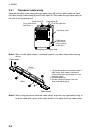
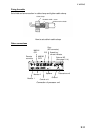
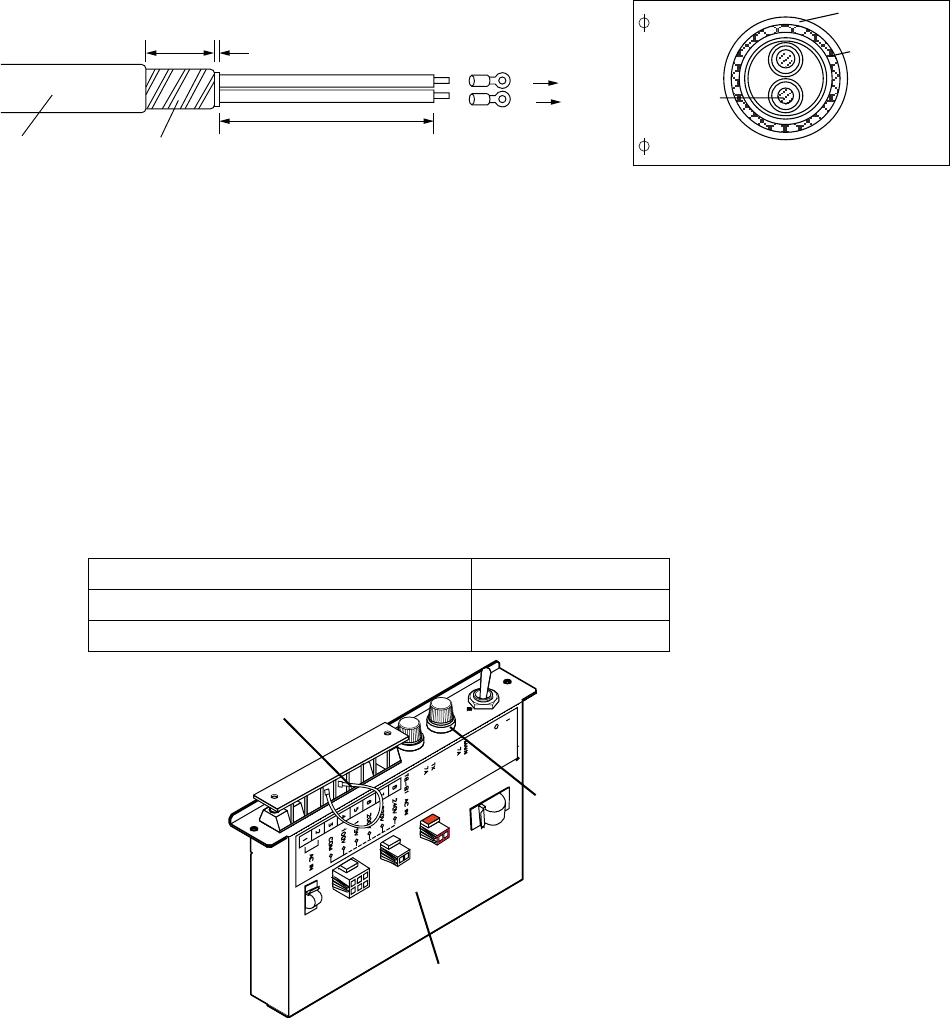
2.3.2 Power cable
40
5
100
Vinyl sheath Armor
TB-B1
FV5.5-4
1
2
DPYCY-4
Conductor
S = 4 mm
= 2.55 mm
2
Armor
Vinyl sheath
15.9 mm
DPYCY-4, sectional view
Fabrication of power cable
Note: When connecting the power cable, the crimp on lug of the capacitor is removed. Do
not forget to reattach the crimp on lug of the capacitor to the terminal board.
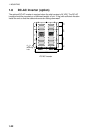
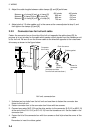
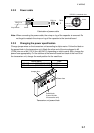
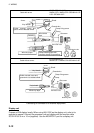
2.3.3 Changing the power specification
Change jumper wires on the transceiver unit according to ship’s mains. Follow the label on
the power block in the transceiver unit. Attach the other end of the wire plugged in #3
(COM) into one of #4 (100 V) thru #8 (240 V) depending on ship’s mains. Also, change the
power fuse appropriately. On the stickers at the terminal board and back of the front lid of
the transceiver unit, change the mark position for the used fuse.
Ship’s mains Fuse
100 VAC series (100/110/115 VAC) 7 A 125 V
220 VAC series (200/220/240 VAC) 4 A 250 V
Jumper wire
Power block
(Lower left side
of transceiver unit)
Power fuse
Transceiver unit power block