


9. CUSTOMIZING YOUR UNIT
9-2
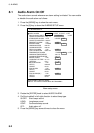
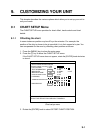
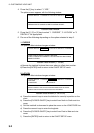
4. Press the [1] key to select “1. YES.”
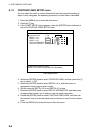
The plotter screen appears with the following window.
OFFSET METHOD
1. CURSOR 2. LAT/LON 3. DELTA L/L 4. CANCEL
TURN KNOB TO SELECT OFFSET METHOD.
PRESS KNOB TO CANCEL CHART POSITION OFFSET.
Position offset window
5. Press the [1], [2] or [3] key to select “1. CURSOR”, “2. LAT/LON” or “3.
DELTA L/L” as appropriate.
6. Do one of the following depending on the option selected at step 5.
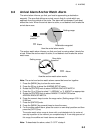
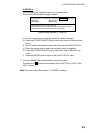
1. CURSOR
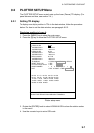
The position offset window changes as below.
OFFSET METHOD
1. CURSOR 2. LAT/LON 3. DELTA L/L 4. CANCEL
TURN KNOB TO SELECT OFFSET METHOD.
PLACE CURSOR ON CORRECT LAT/LON POSITION AND PRESS
KNOB TO ENTER.
Position offset window (1. Cursor)
a) Operate the trackball to place the cursor where to offset chart position.
b) Press the [ENTER] knob to return to the CHART SETUP menu.
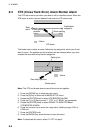
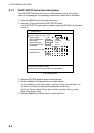
2. LAT/LON
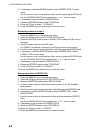
The position offset window changes as below.
TURN KNOB TO SELECT OFFSET METHOD.
ENTER CORRECT LAT/LON POSITION AND PRESS KNOB TO ENTER.
CURSOR ON/OFF: SWITCH NOUTH/SOUTH & EAST/WEST
OFFSET METHOD
1. CURSOR 2. LAT/LON 3. DELTA L/L 4. CANCEL
LATITUDE 00°00.000' N
LONGITUDE 000°00.000' E
Position offset window (2. LAT/LON)
a) Press the numeric keys to enter the latitude for own ship’s position on the
chart.
b) Press the [CURSOR ON/OFF] key to switch from North to South and vice
versa.
c) Roll the trackball to downward to place the cursor on the LONGITUDE line.
d) Press the numeric keys to enter the longitude.
e) Press the [CURSOR ON/OFF] key to switch from East to West and vice
versa.
f) Press the [ENTER] knob to return to the CHART SETUP menu.